How to receive SMS with webhook
This guide explains how to receive SMS messages on an Android phone and forward them automatically to your application through webhooks. You will install and configure Ozeki SMS Client, register a webhook using either the Web GUI or cURL, and verify successful delivery with the included Webhook tester. Finally, you will learn how to monitor webhook calls and review logs when troubleshooting delivery issues.
How does it work
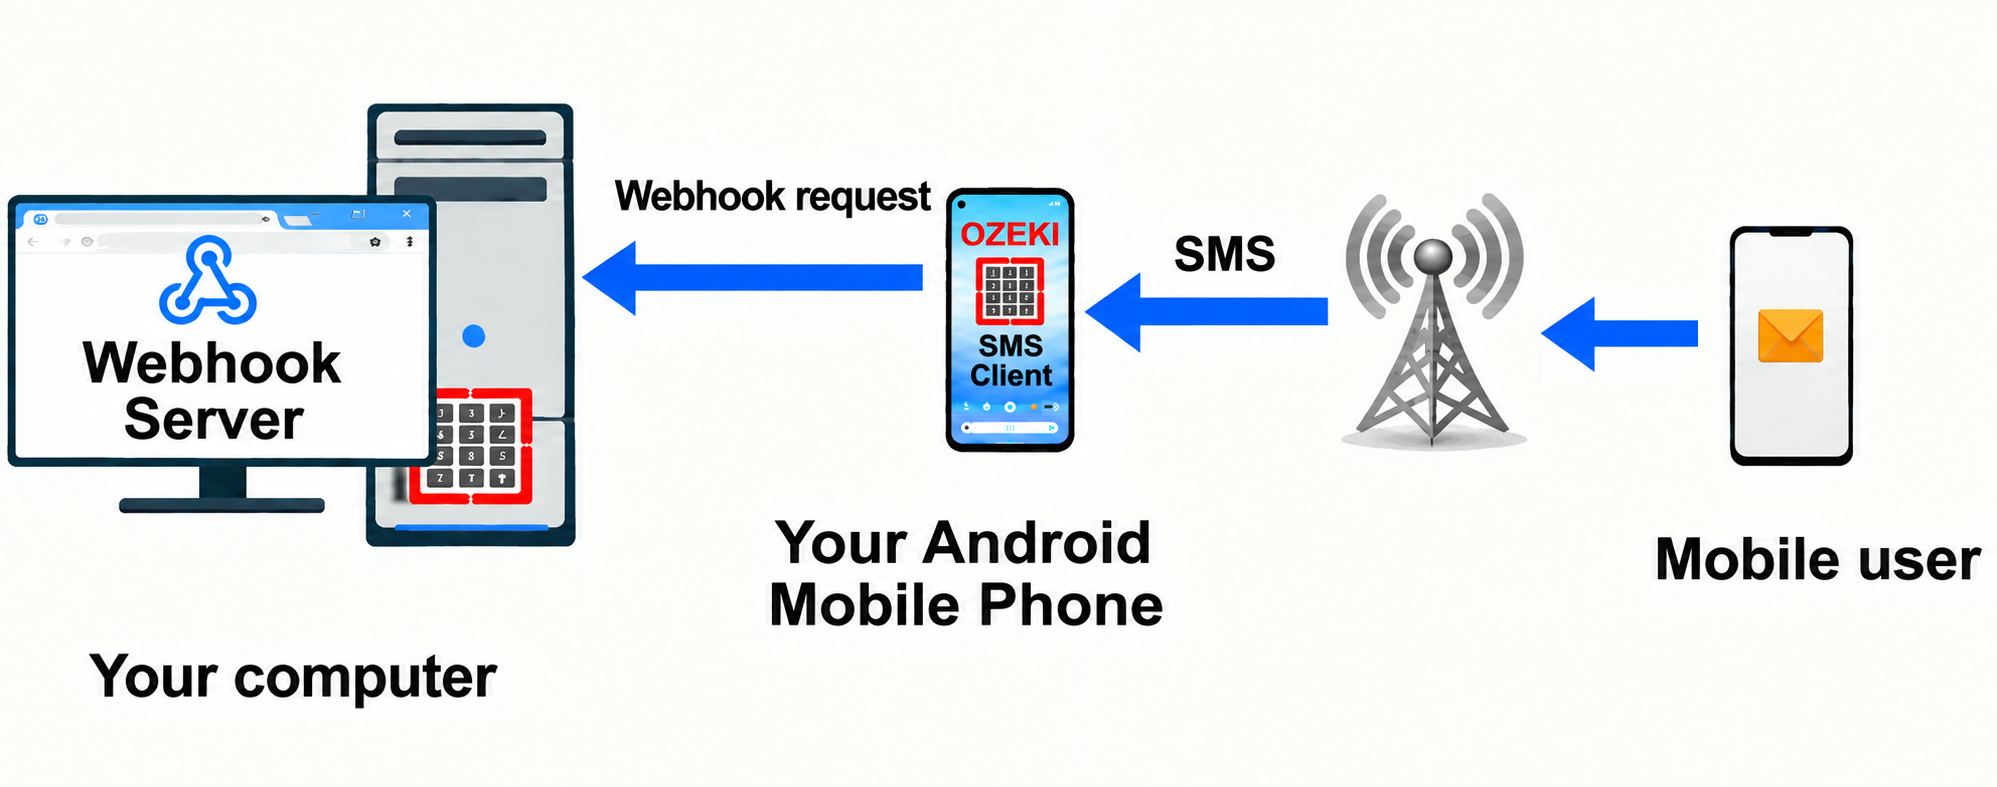
End-to-End Incoming SMS Webhook Flow
How to install the Ozeki SMS Client on Android
The following video tutorial takes you through the steps of Installing the Android SMS Client software on your Android mobile. Note, that you will need to download the Android SMS app from android-sms-gateway.com. After installation make sure you enable the necessary permissions for Ozeki app. This will enable the app to run seamlessly in the background.
Installation steps
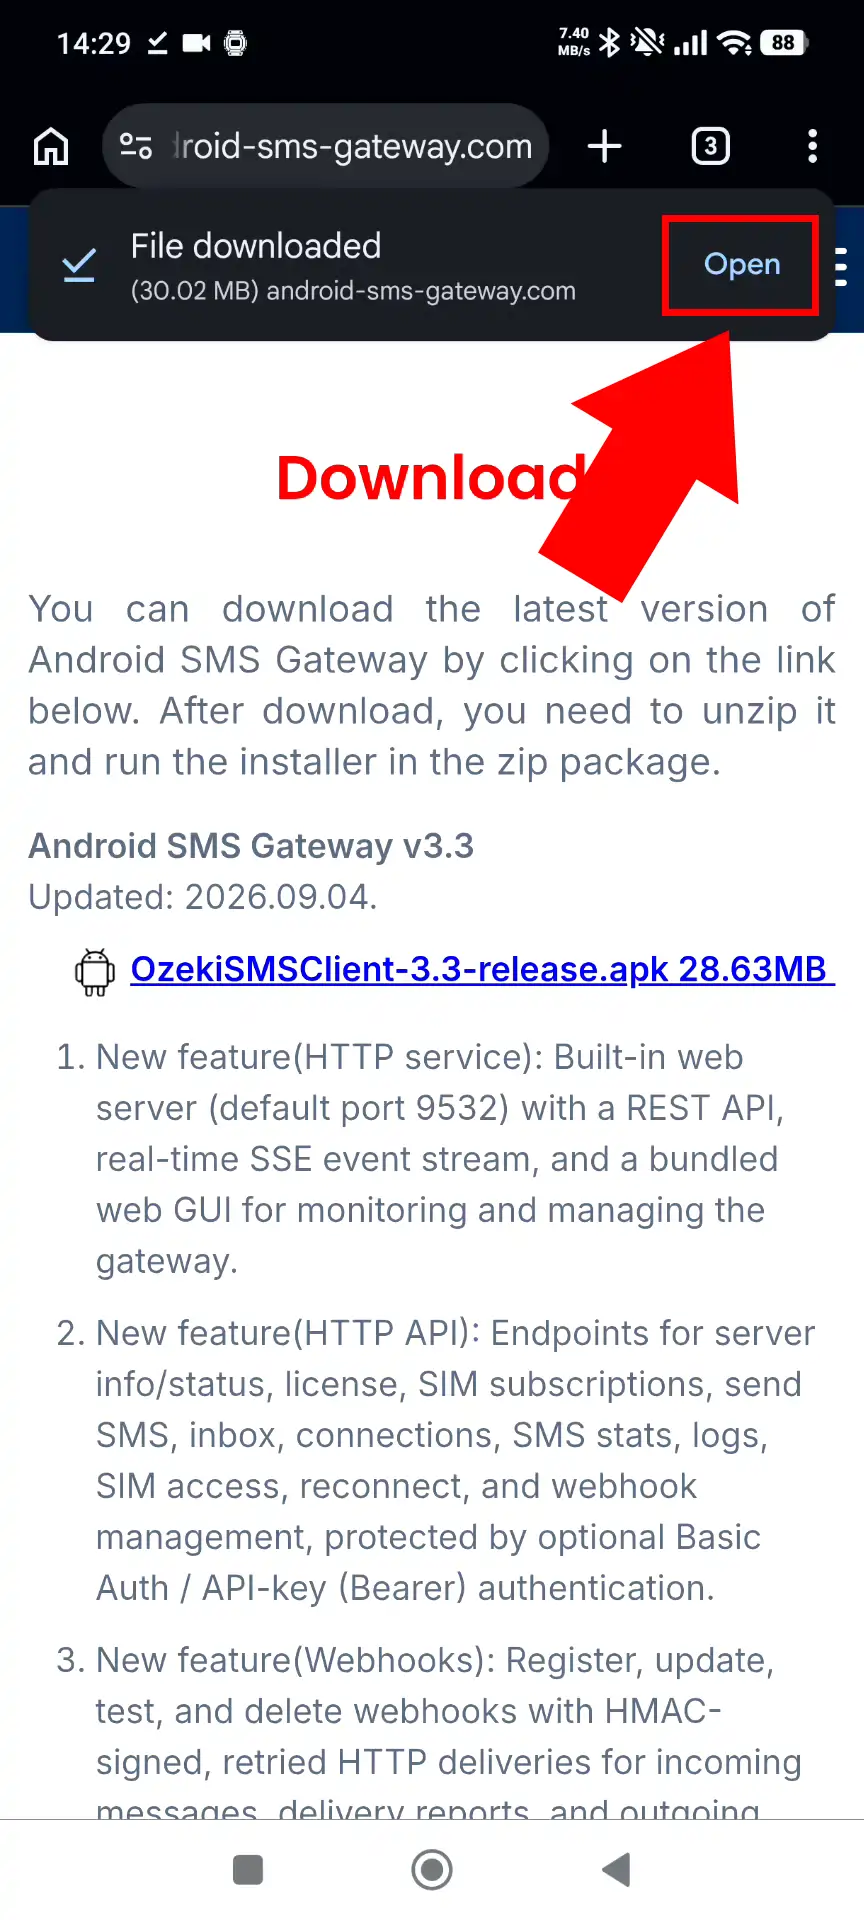
Open the Android SMS Gateway download page in the phone’s browser. Download the Ozeki SMS Client APK installation package. Wait until the download finishes before opening the file.
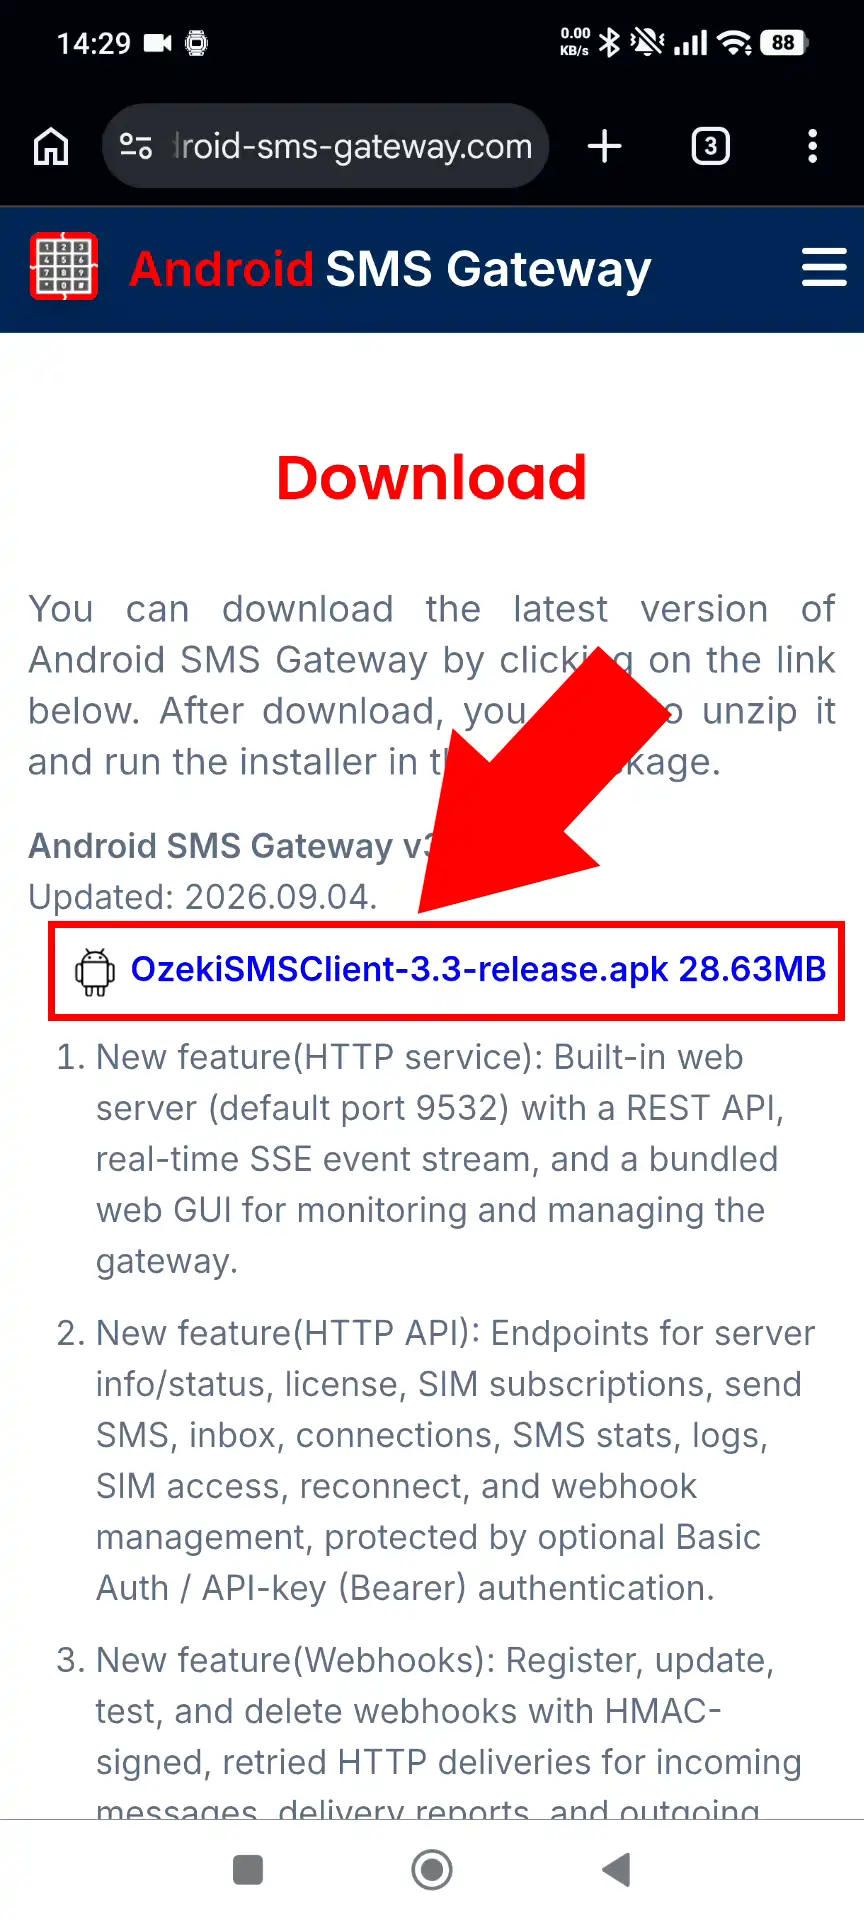
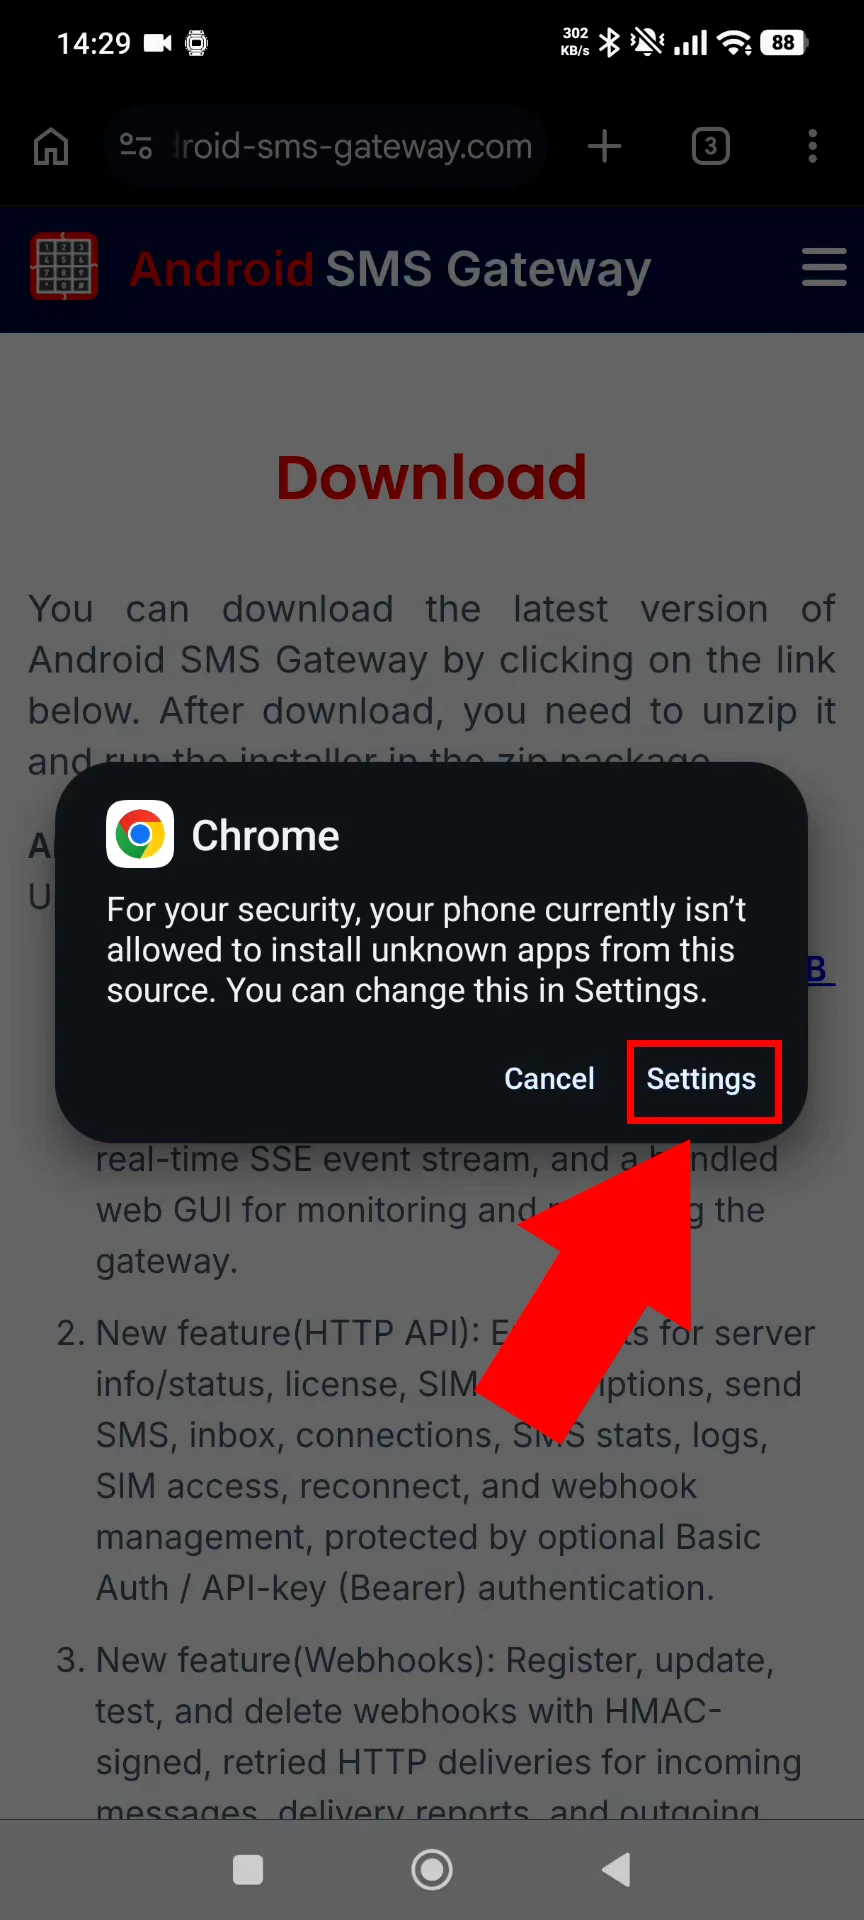
Open the downloaded APK from the browser notification or Downloads folder. Android may display a security prompt because the app was not installed from Google Play. Continue to the installation settings when prompted.
Tap Settings in the Android security warning dialog. This opens the permission page for the app that downloaded or opened the APK. The next step is to allow that app to install external applications.
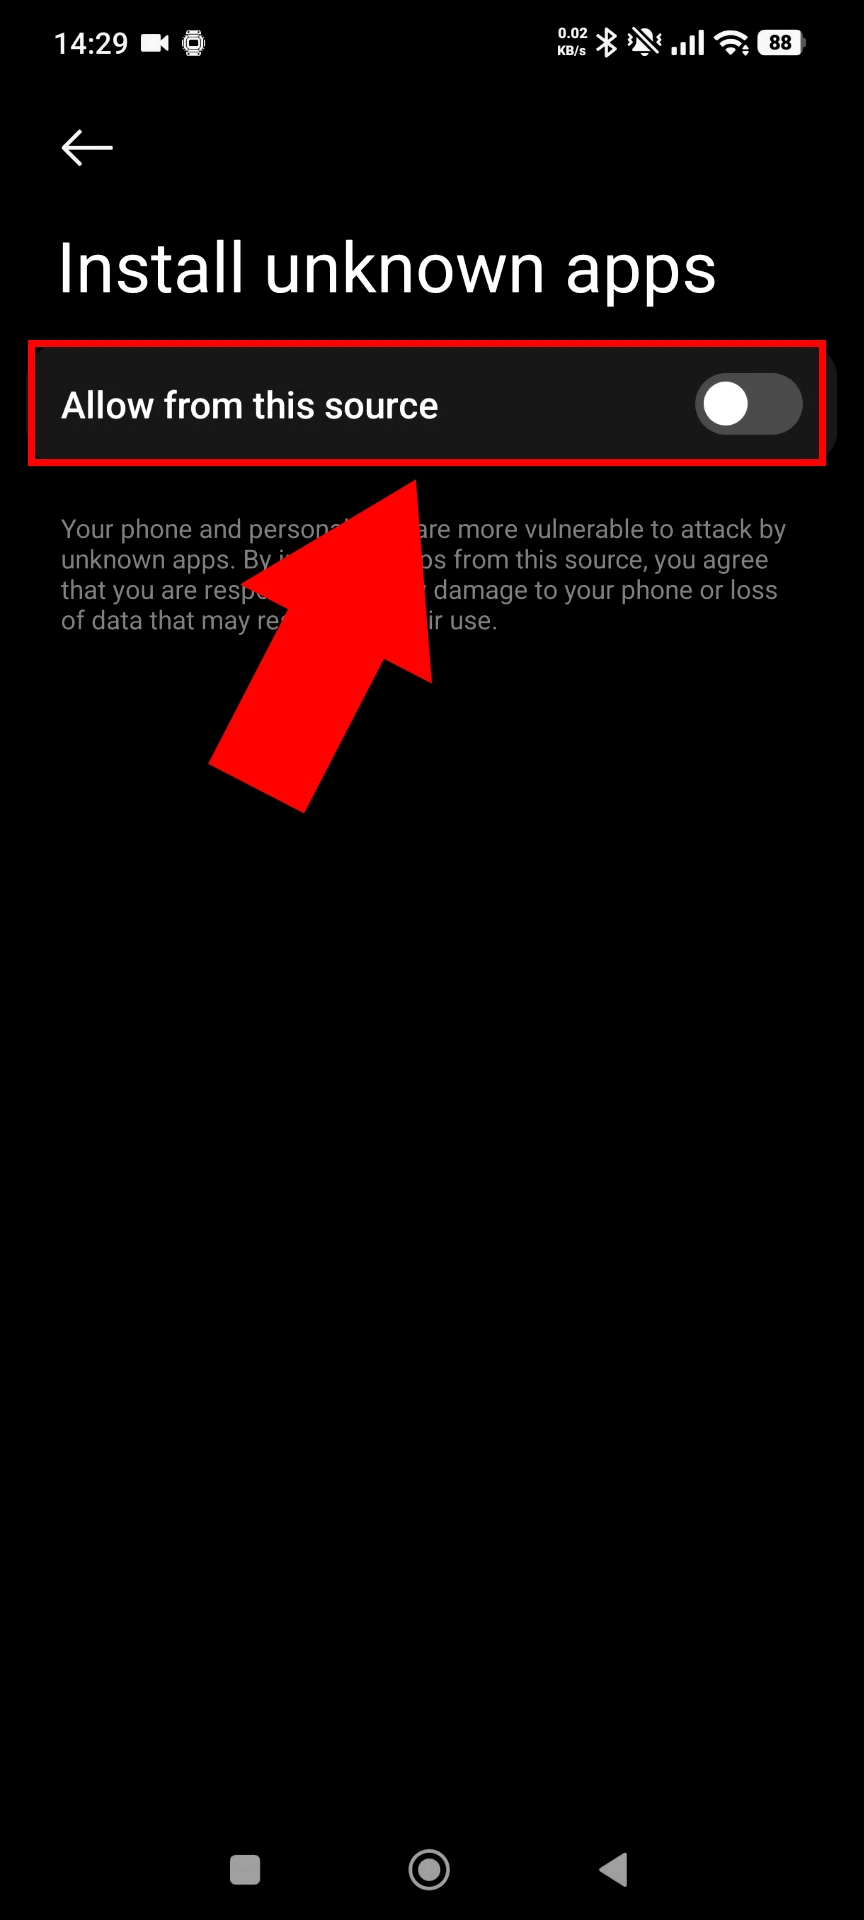
Enable Allow from this source or Install unknown apps. This temporarily authorizes the browser or file manager to install the Ozeki APK. Return to the installation screen after enabling the setting.
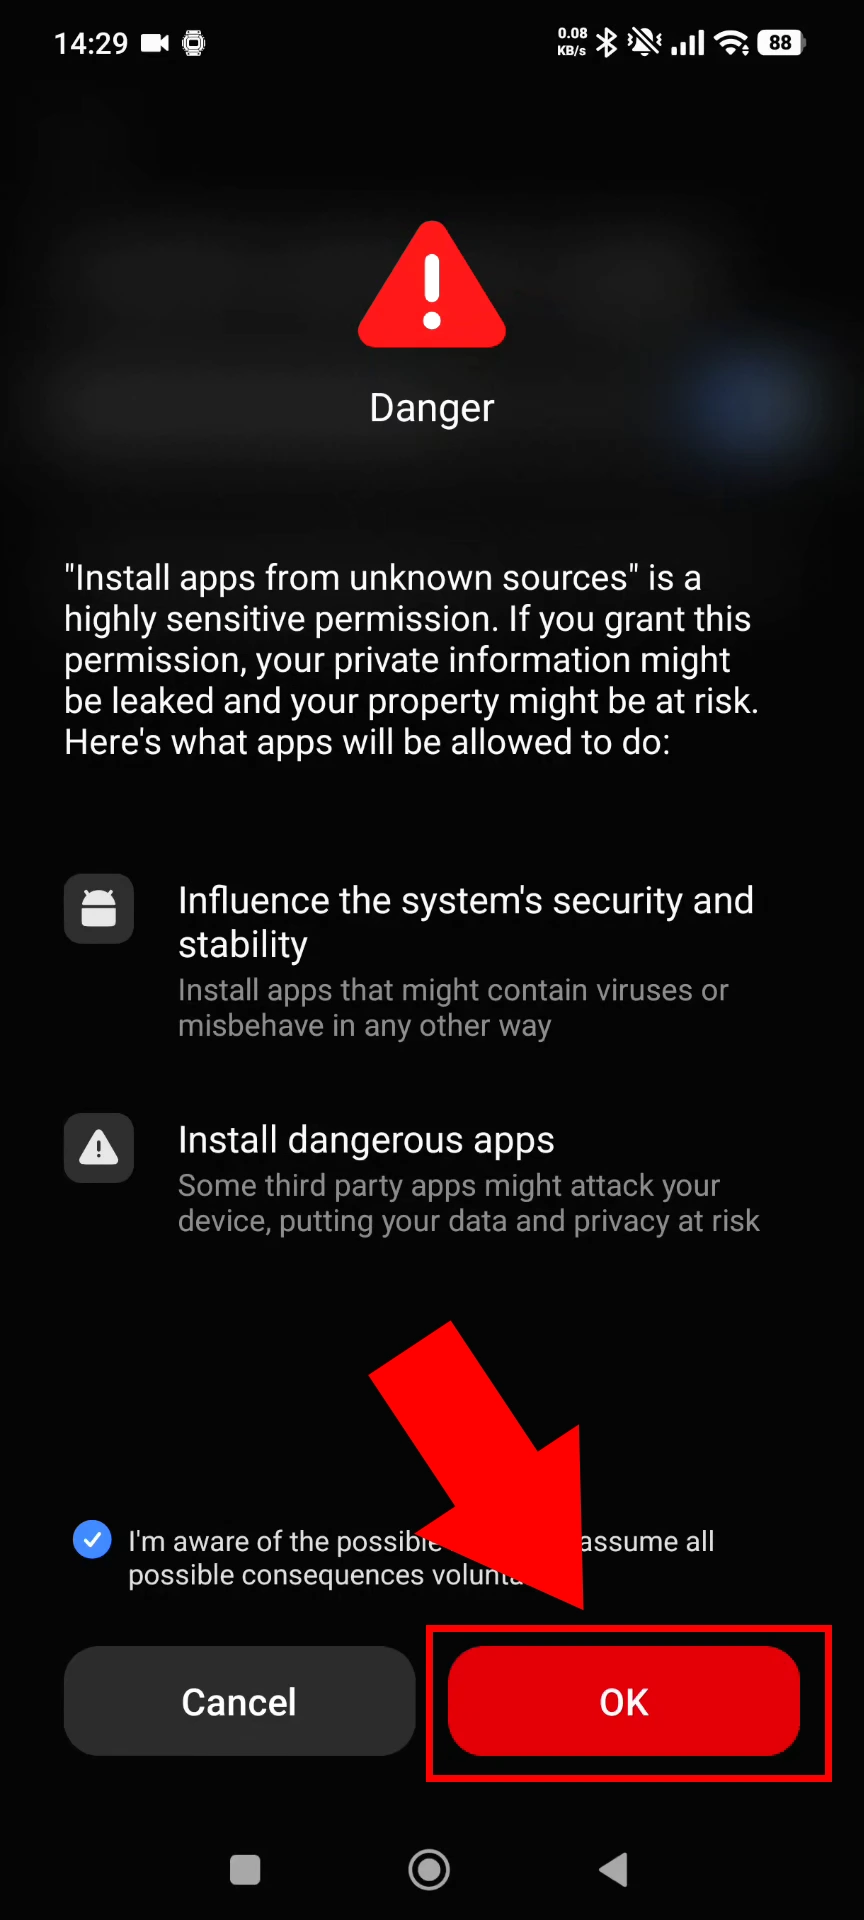
Android may warn that installing apps from unknown sources can be unsafe. Confirm the warning only after verifying that the APK was downloaded from the official source. This allows the Ozeki SMS Client installation to continue.
Tap Install to copy and install the Ozeki SMS Client on the phone. Keep the phone unlocked and wait for Android to complete the process. When installation finishes, select Open to launch the application.
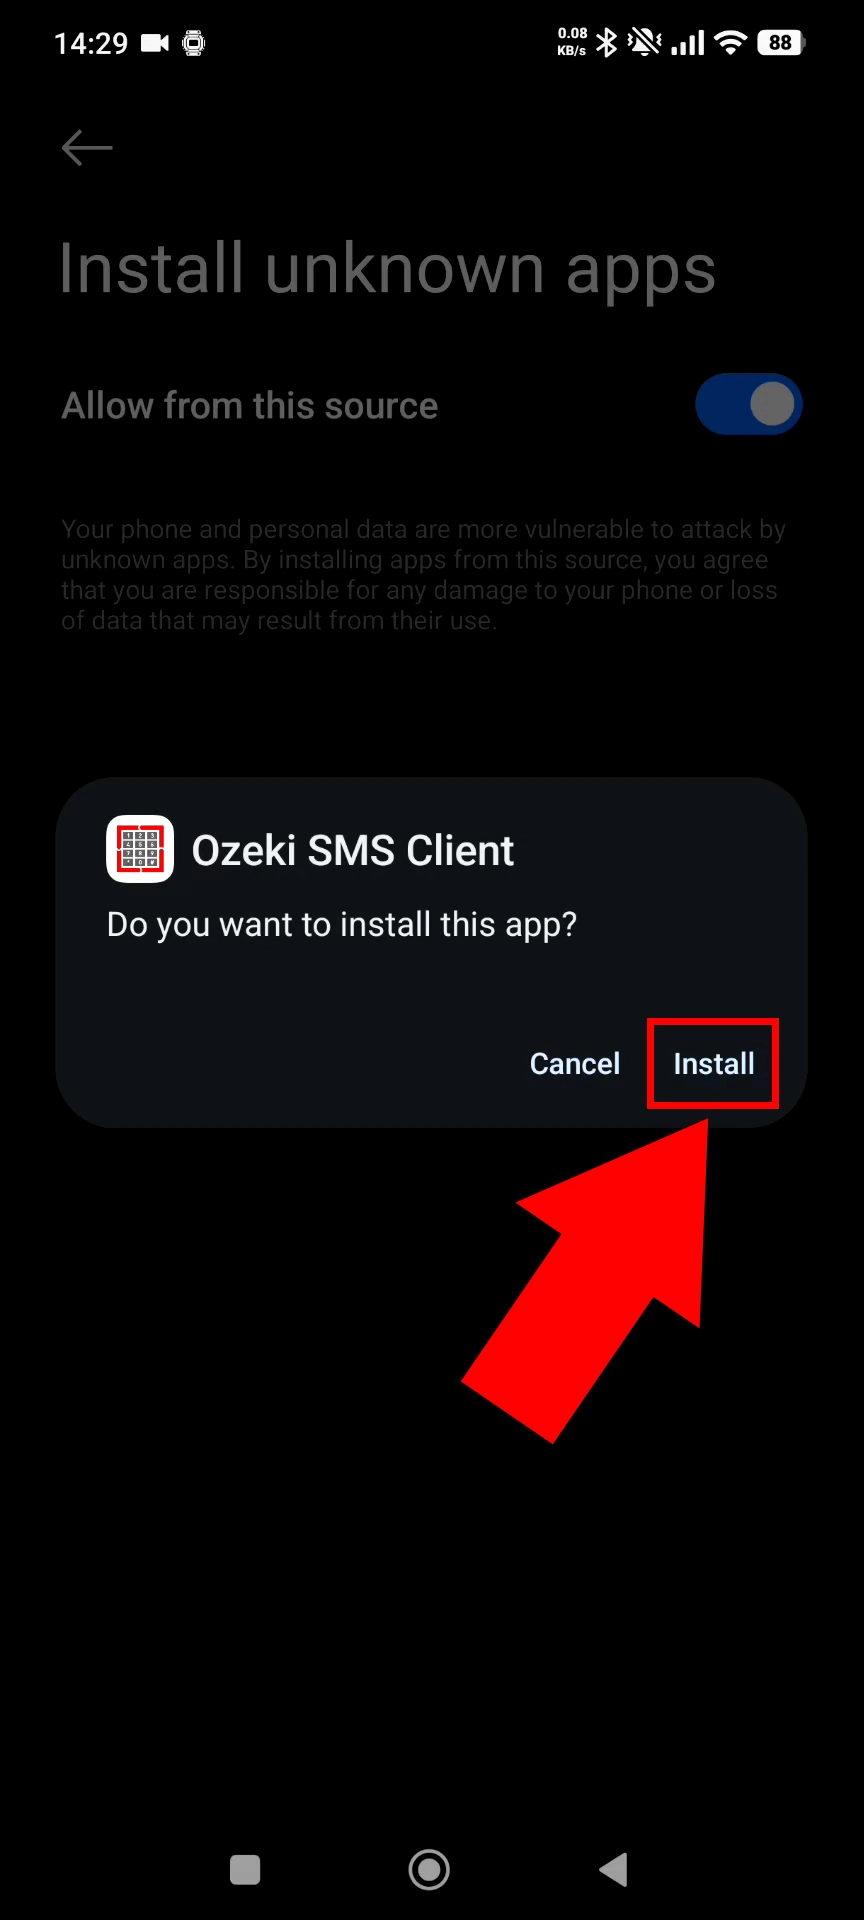
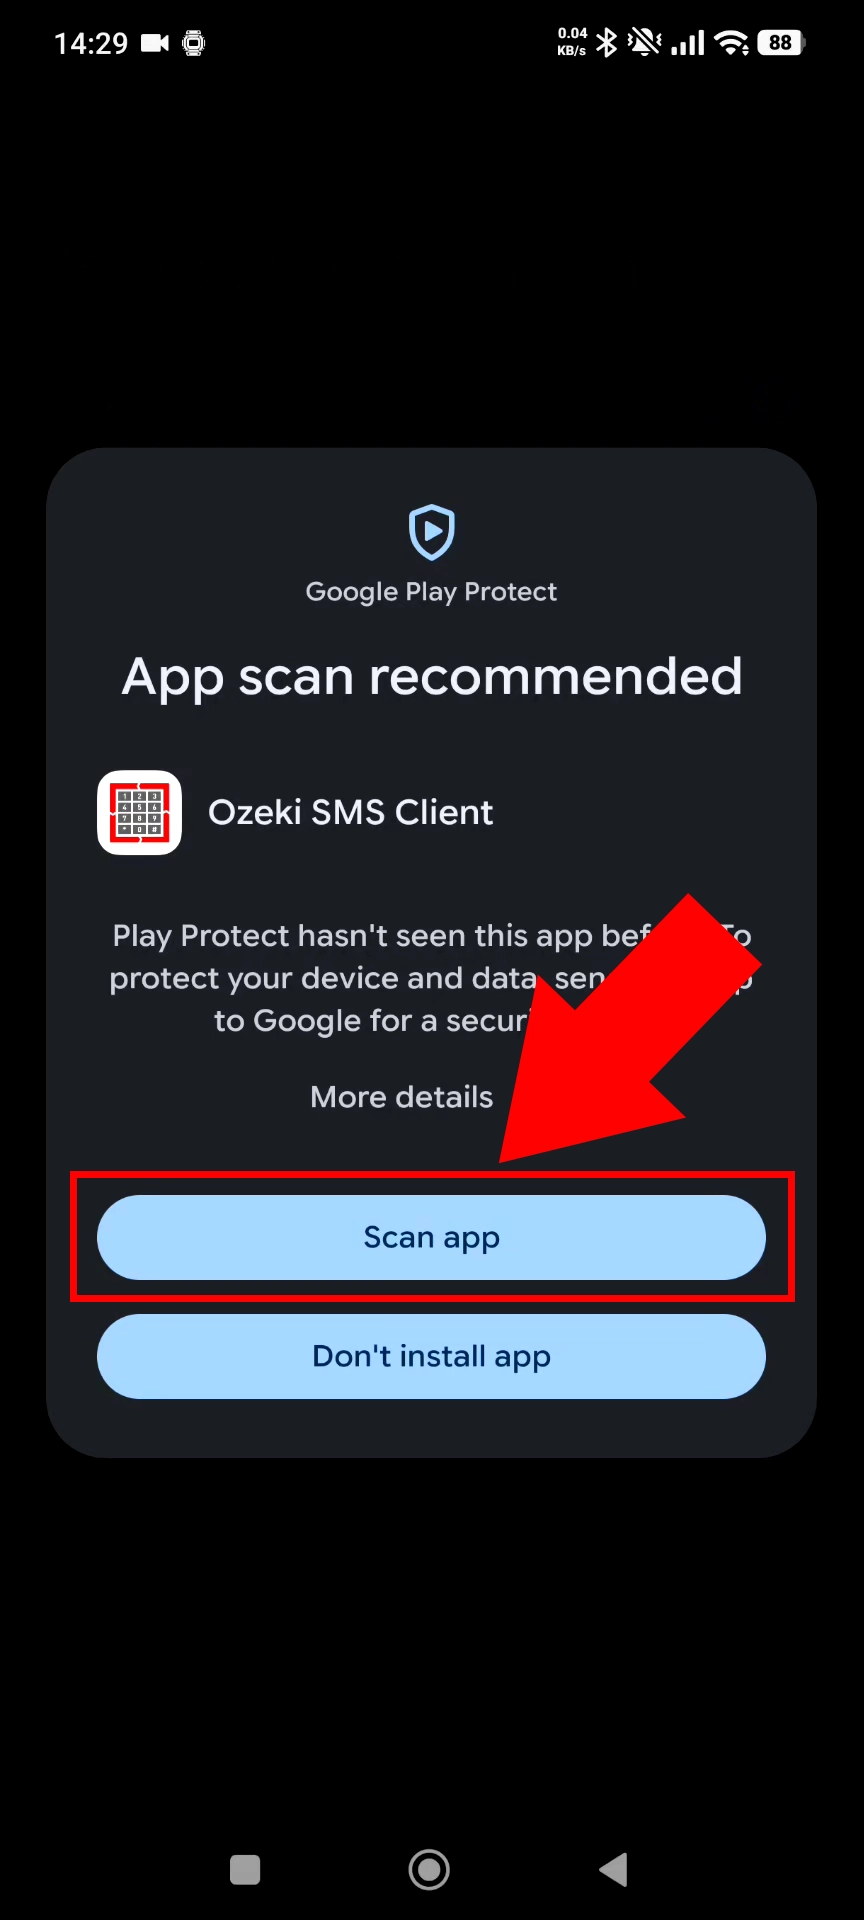
Android or Google Play Protect may scan the newly installed application. Allow the scan to finish so the installation can be reviewed for potential risks. If the official Ozeki application is confirmed, proceed with the installation.
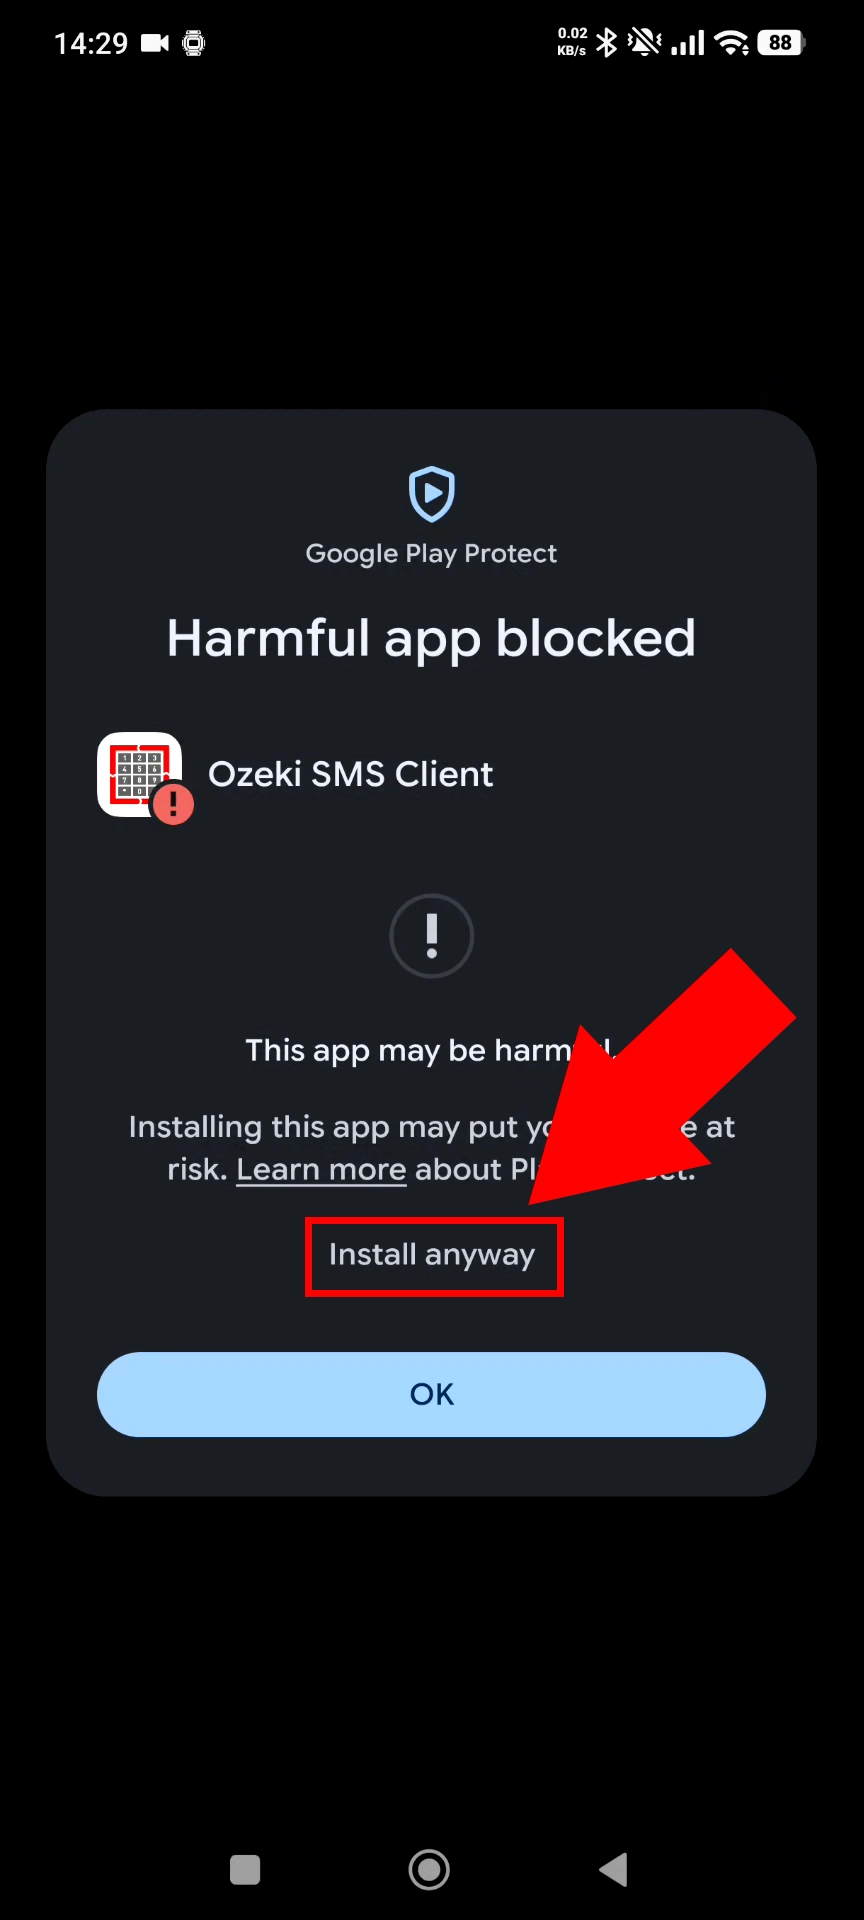
If Play Protect displays a warning, select Install anyway for the verified Ozeki APK. Use this option only when the file came from the official Android SMS Gateway site. The application can then be installed and started normally.
Launch the Ozeki SMS Client from the installation screen or app drawer. The application provides a local web interface and HTTP API for SMS sending. Keep it installed on the Android phone that contains the SIM card.
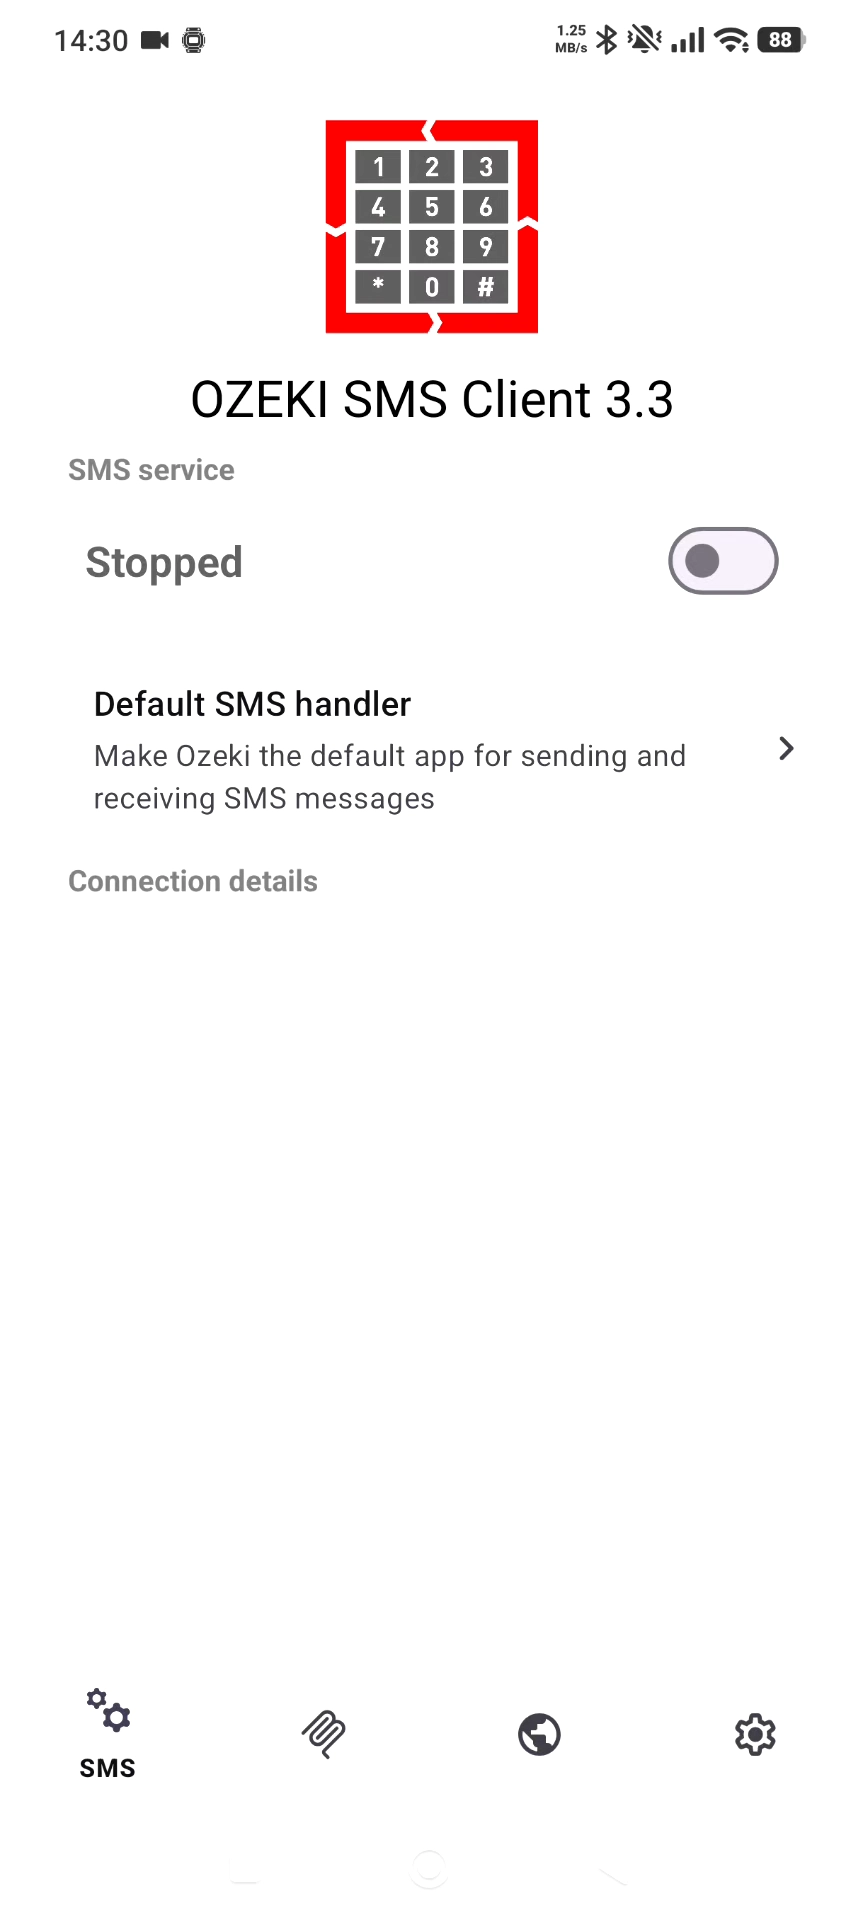
How to start HTTP API service
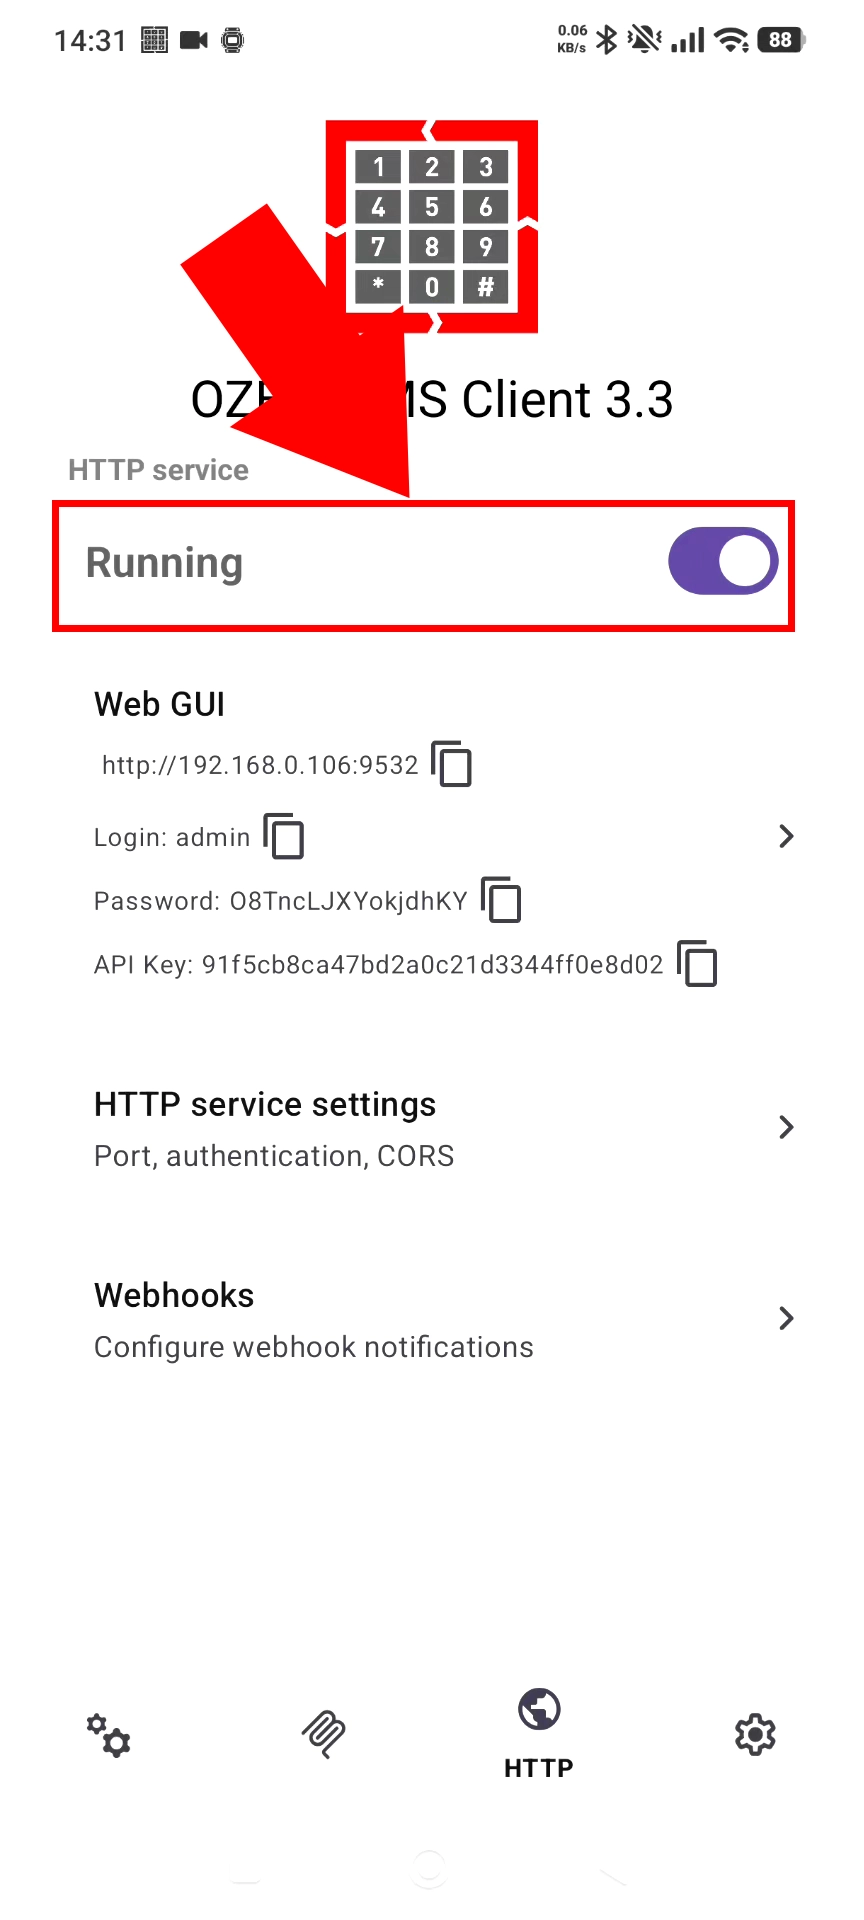
In Ozeki SMS Client, start the HTTP Service from the main screen. The service listens for web requests sent to the phone over the local Wi-Fi network. Note the displayed IP address and port for opening the browser interface later.
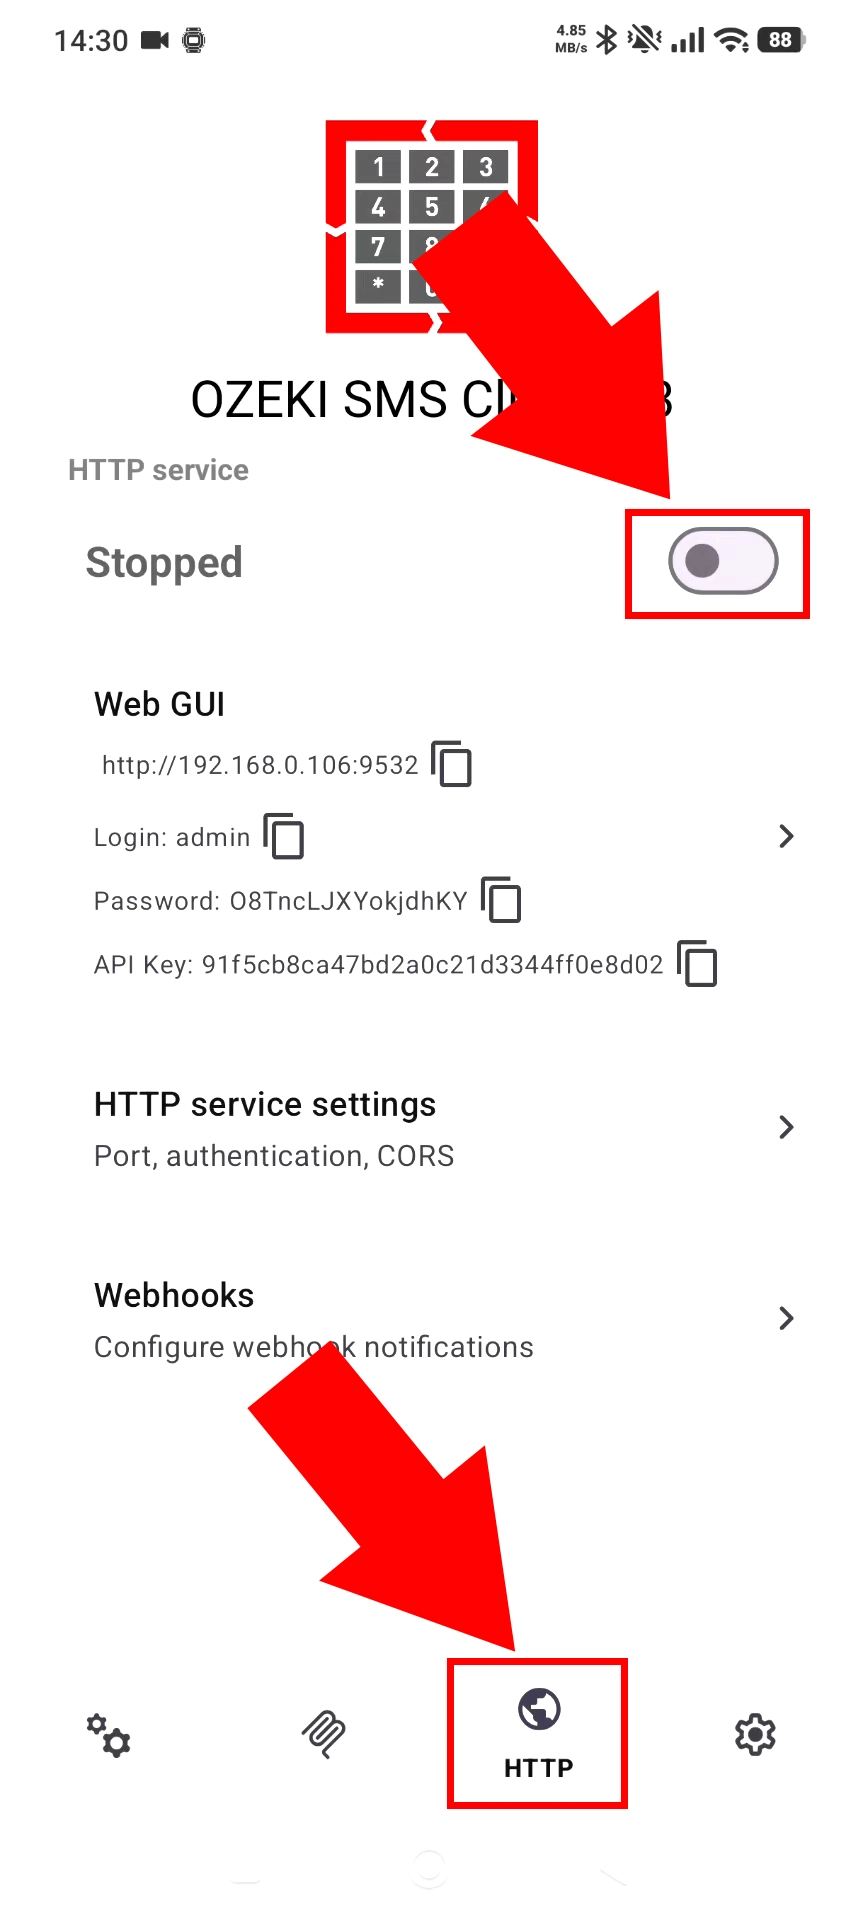
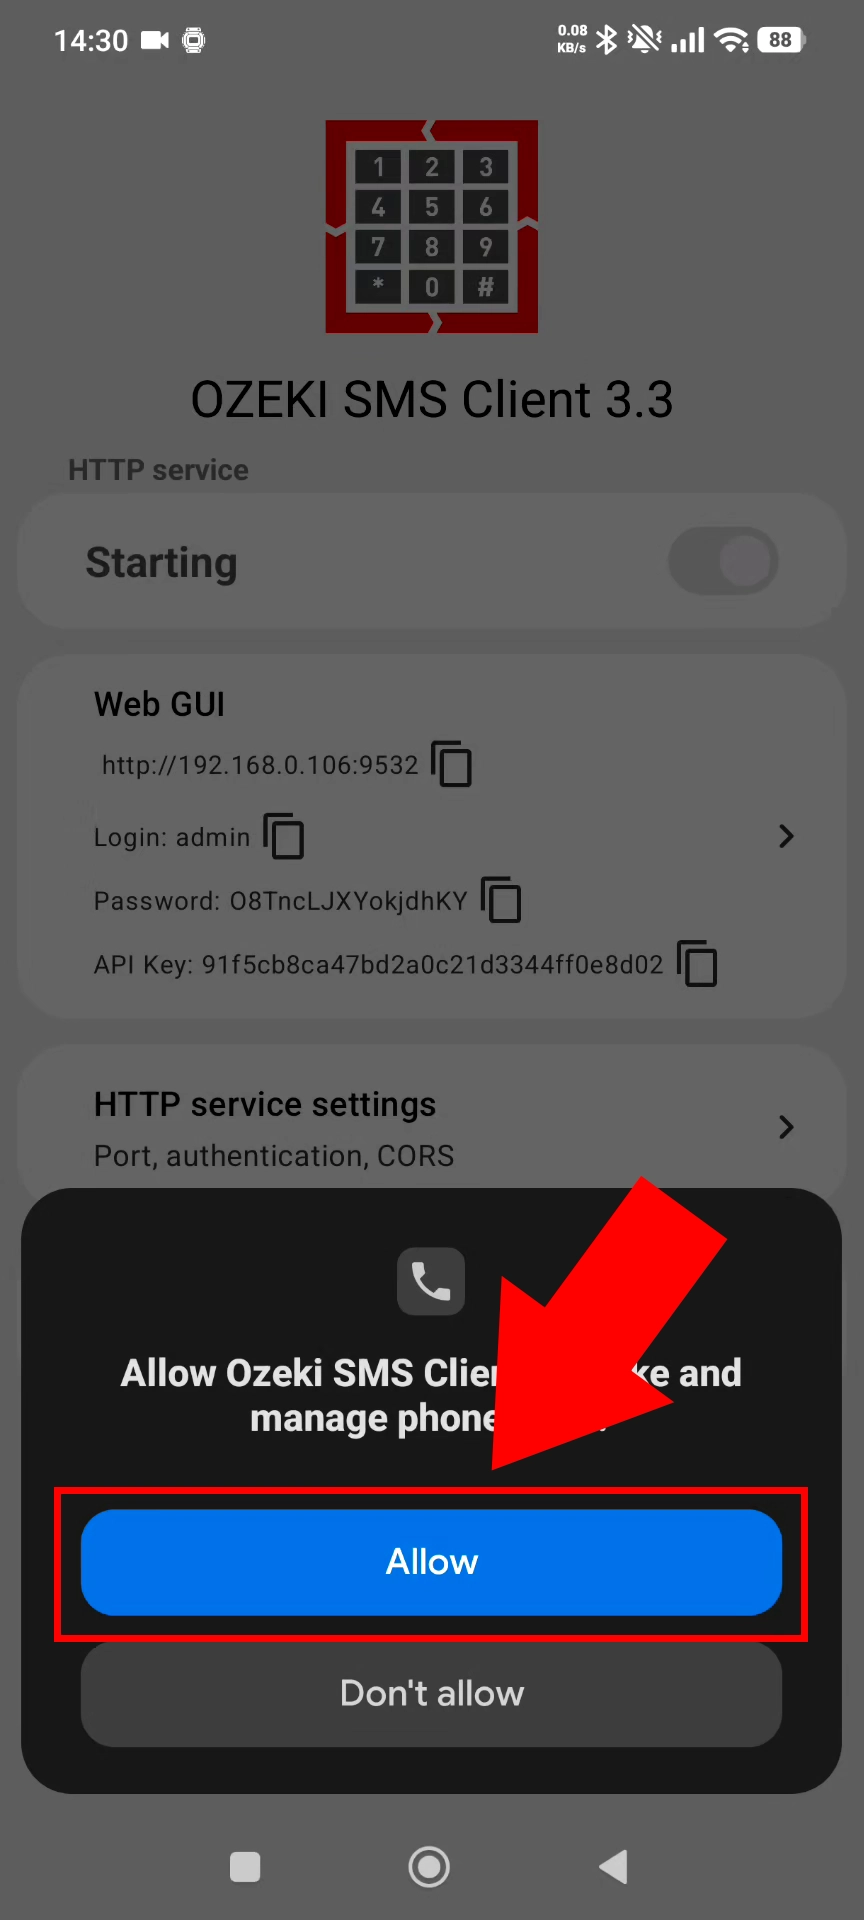
Accept the requested Android permissions when the application asks for them. These permissions are necessary for sending SMS messages and maintaining service operation. Without them, the HTTP interface may be available but cannot send messages correctly.
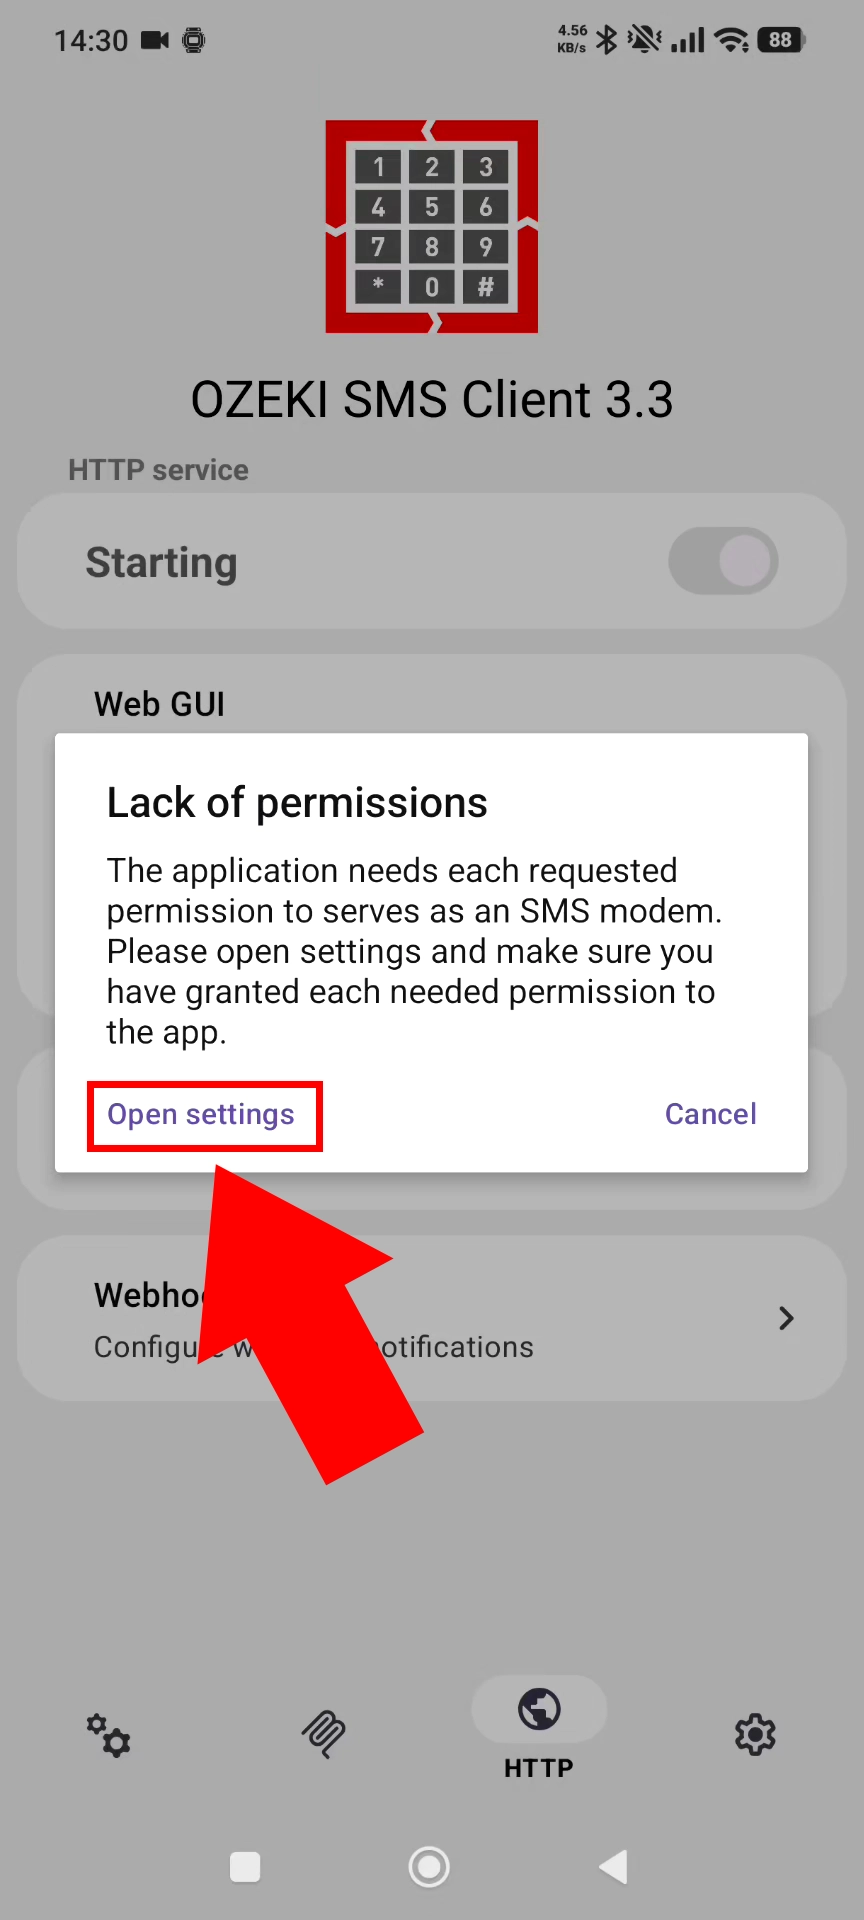
Open the Android application settings for Ozeki SMS Client. Review the permissions, battery, and restricted-settings options available for the app. Configure them so the gateway can continue working in the background.
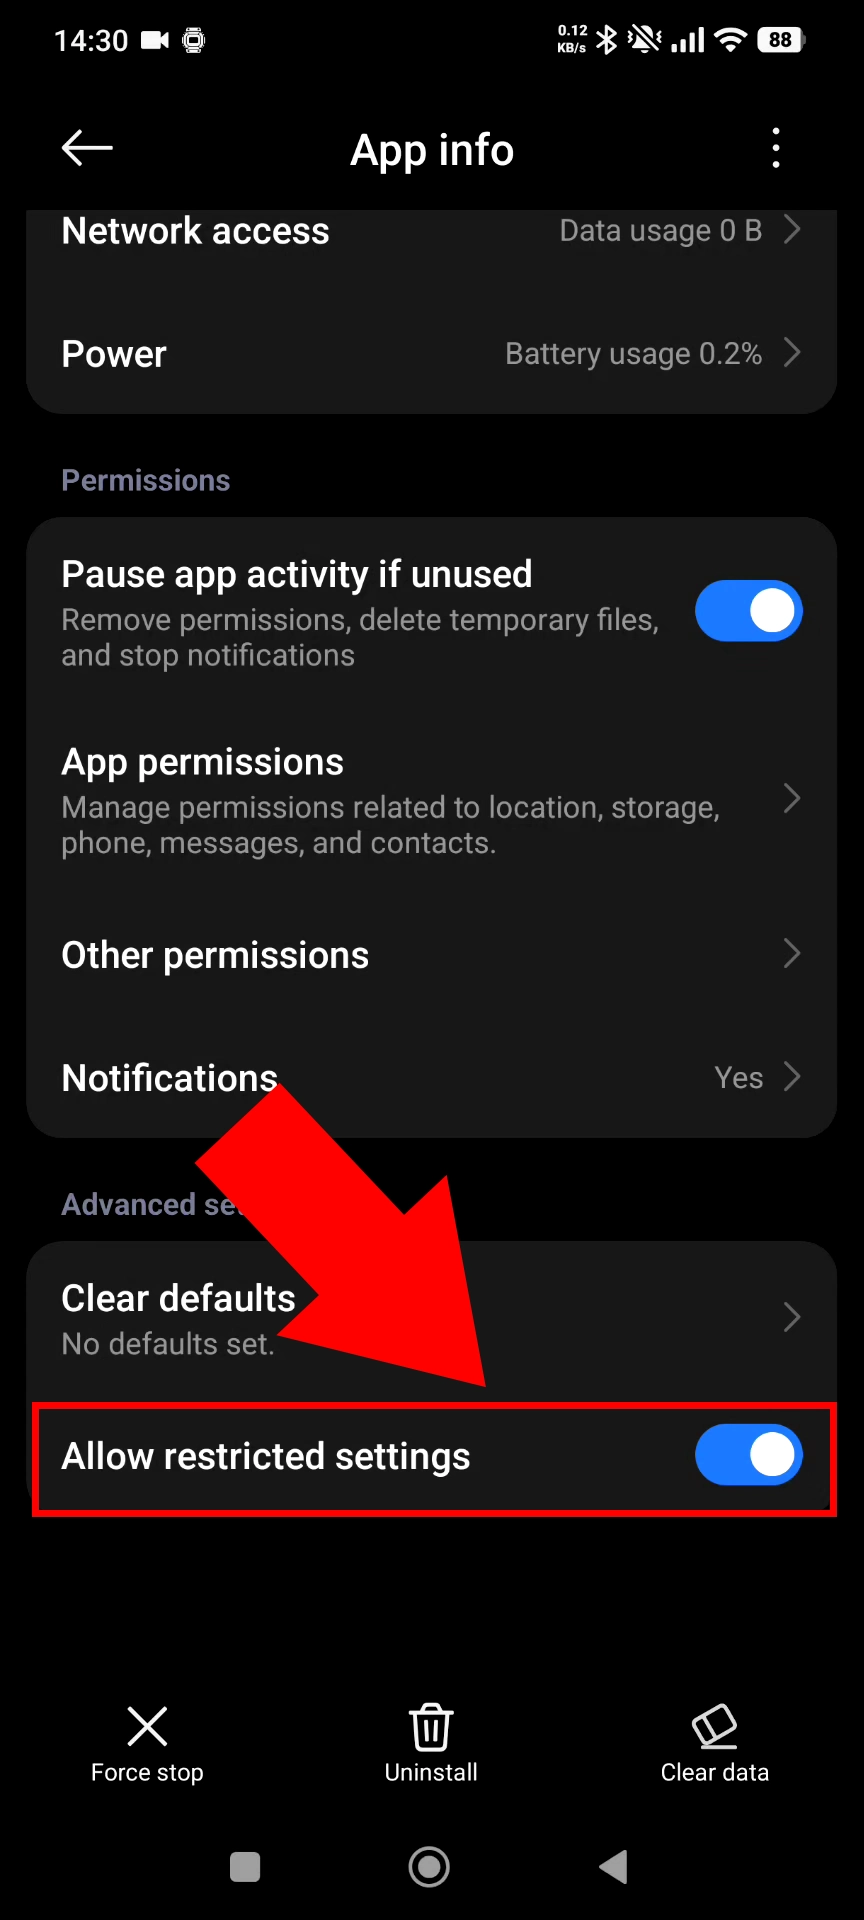
Enable restricted settings for Ozeki SMS Client if Android blocks sensitive permissions. This makes it possible to grant the app the access it needs for gateway operation. Return to the app’s permission page once the setting is enabled.
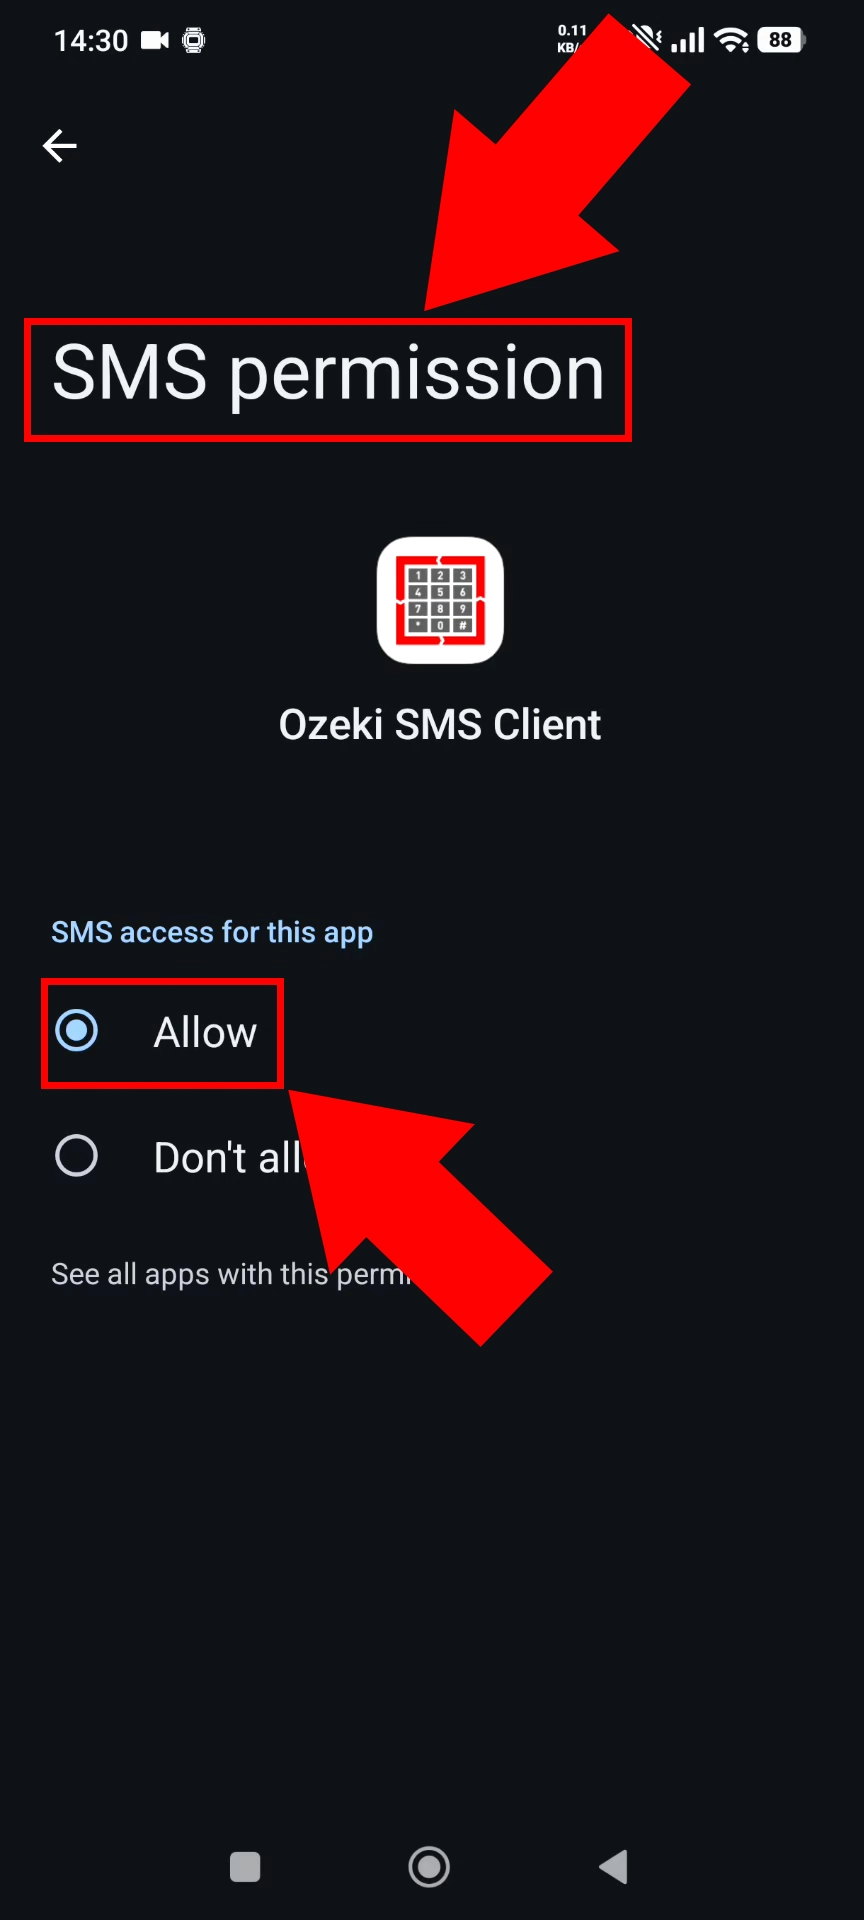
Grant the SMS permission to Ozeki SMS Client. This permission allows the Android phone to submit outgoing SMS messages through its SIM card. It is essential for messages sent from the browser or HTTP API.
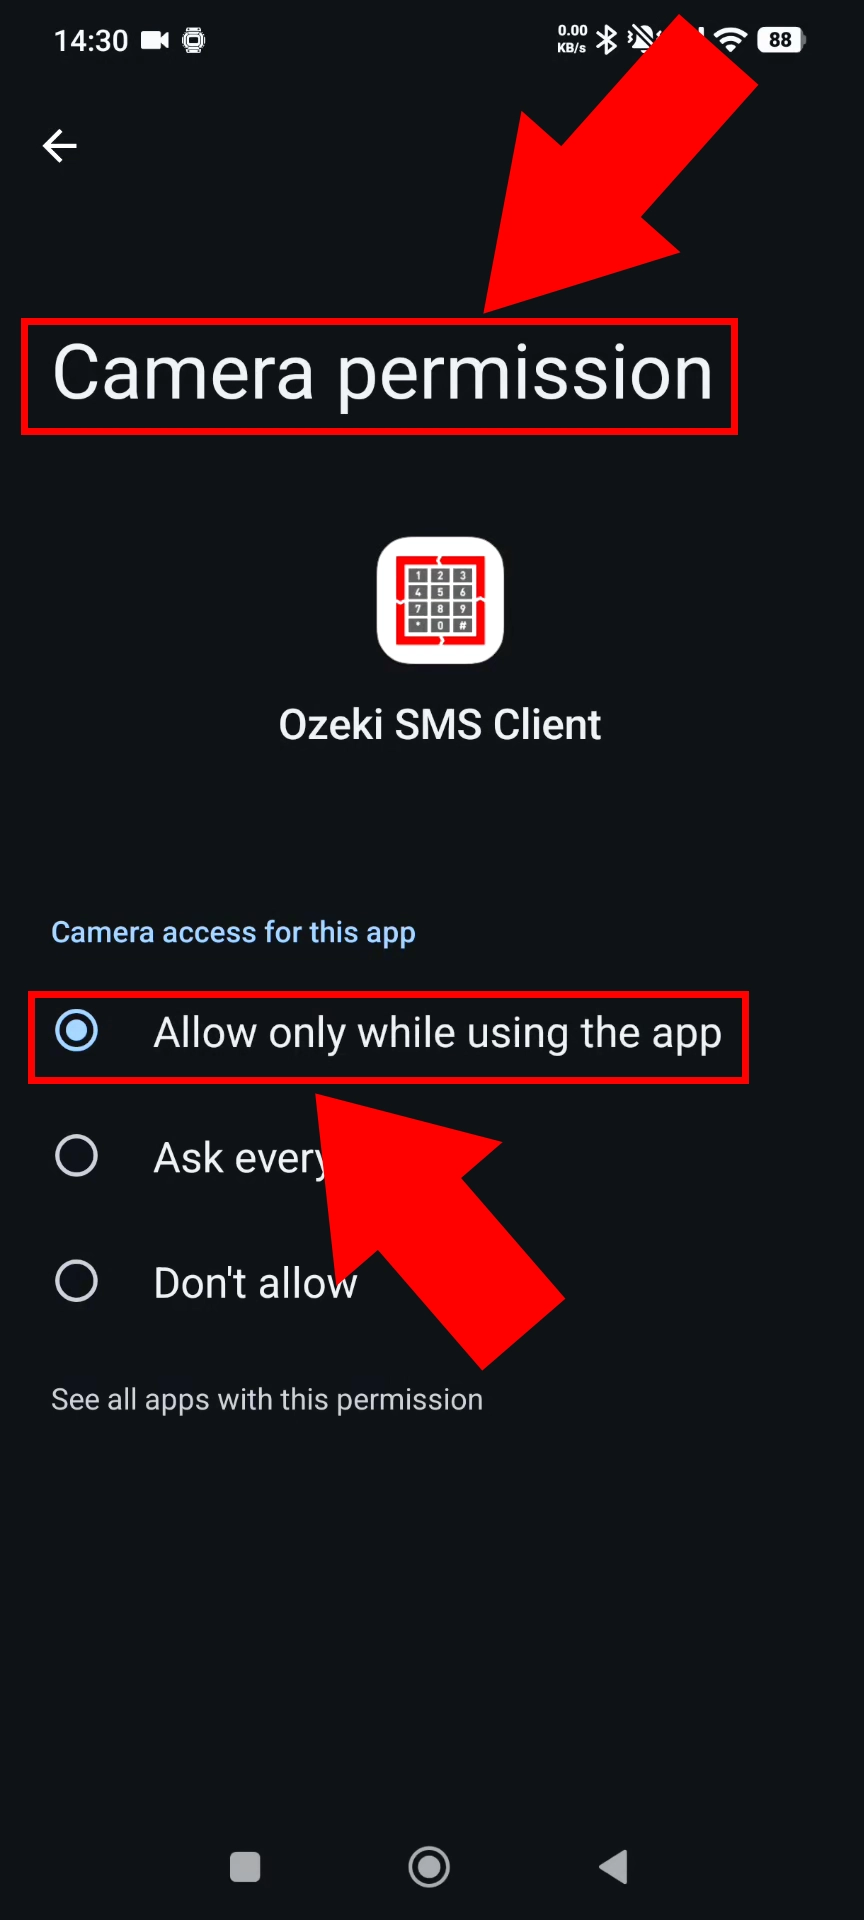
Grant camera permission if the application requests it for QR-code or setup functions. This can simplify connection or configuration tasks within the Ozeki application. The core SMS sending workflow still depends primarily on SMS and network access.
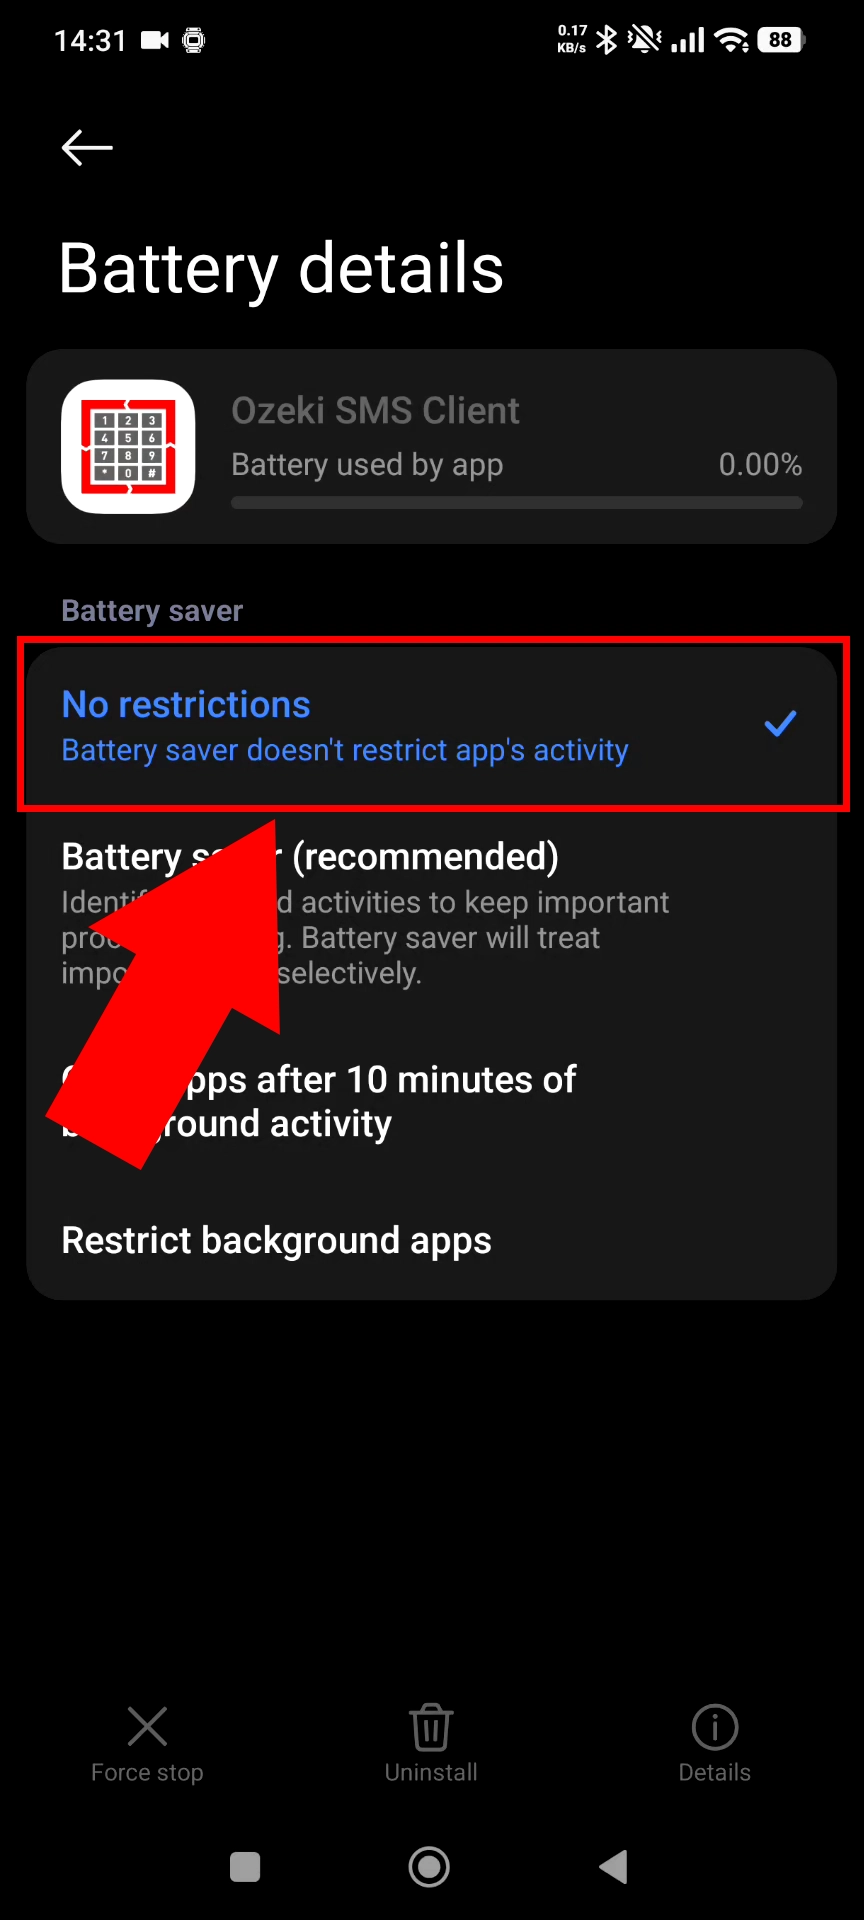
Set battery usage for Ozeki SMS Client to Unrestricted or disable battery optimization. This prevents Android from stopping the HTTP service while the phone is idle. The gateway can then remain reachable from the browser for longer periods.
Verify that the HTTP Service status is shown as running in Ozeki SMS Client. Use the displayed local IP address and port as the browser access address. Ensure the phone stays connected to Wi-Fi while you send SMS messages.
Webhook tester
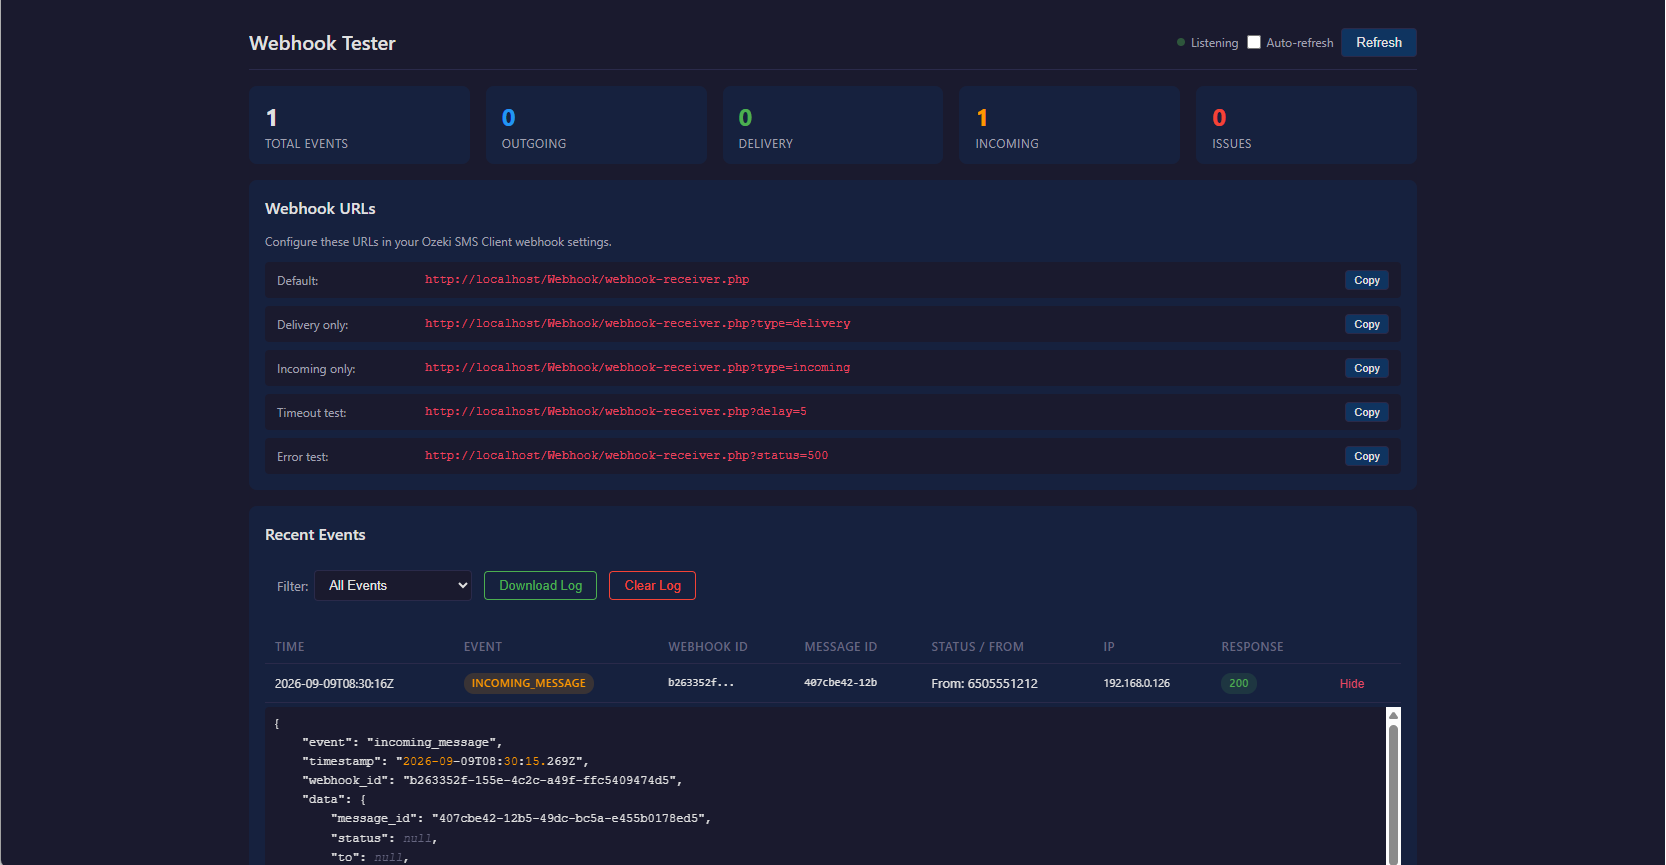
Use the Webhook tester application to verify that your webhook endpoint receives incoming SMS events correctly. Start the tester, copy its generated webhook URL, and register it in the Ozeki SMS Client HTTP API. When an SMS arrives on the Android phone, the tester displays the received HTTP request and message data.
Webhook tester applicaton: Webhook-tester.zip
How to register webhook with Web GUI
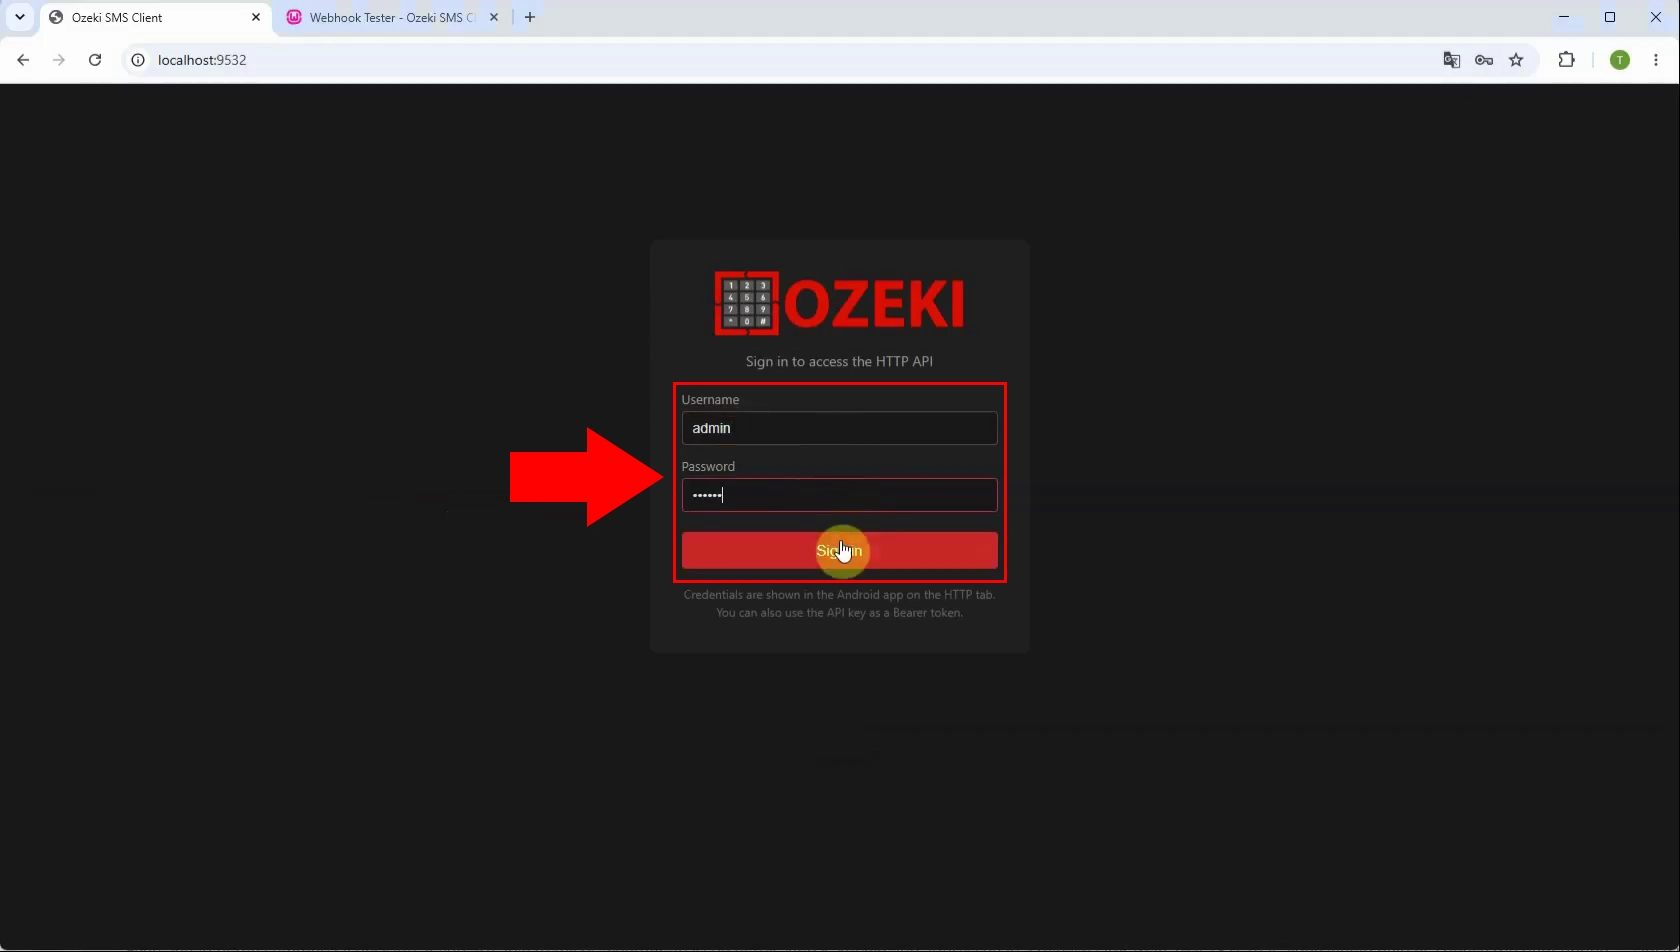
Open the Ozeki SMS Client Web GUI in a browser by using the phone’s displayed IP address and HTTP service port. Enter the configured username and password to access the administration interface. After a successful login, open the Webhooks page to manage webhook subscriptions.
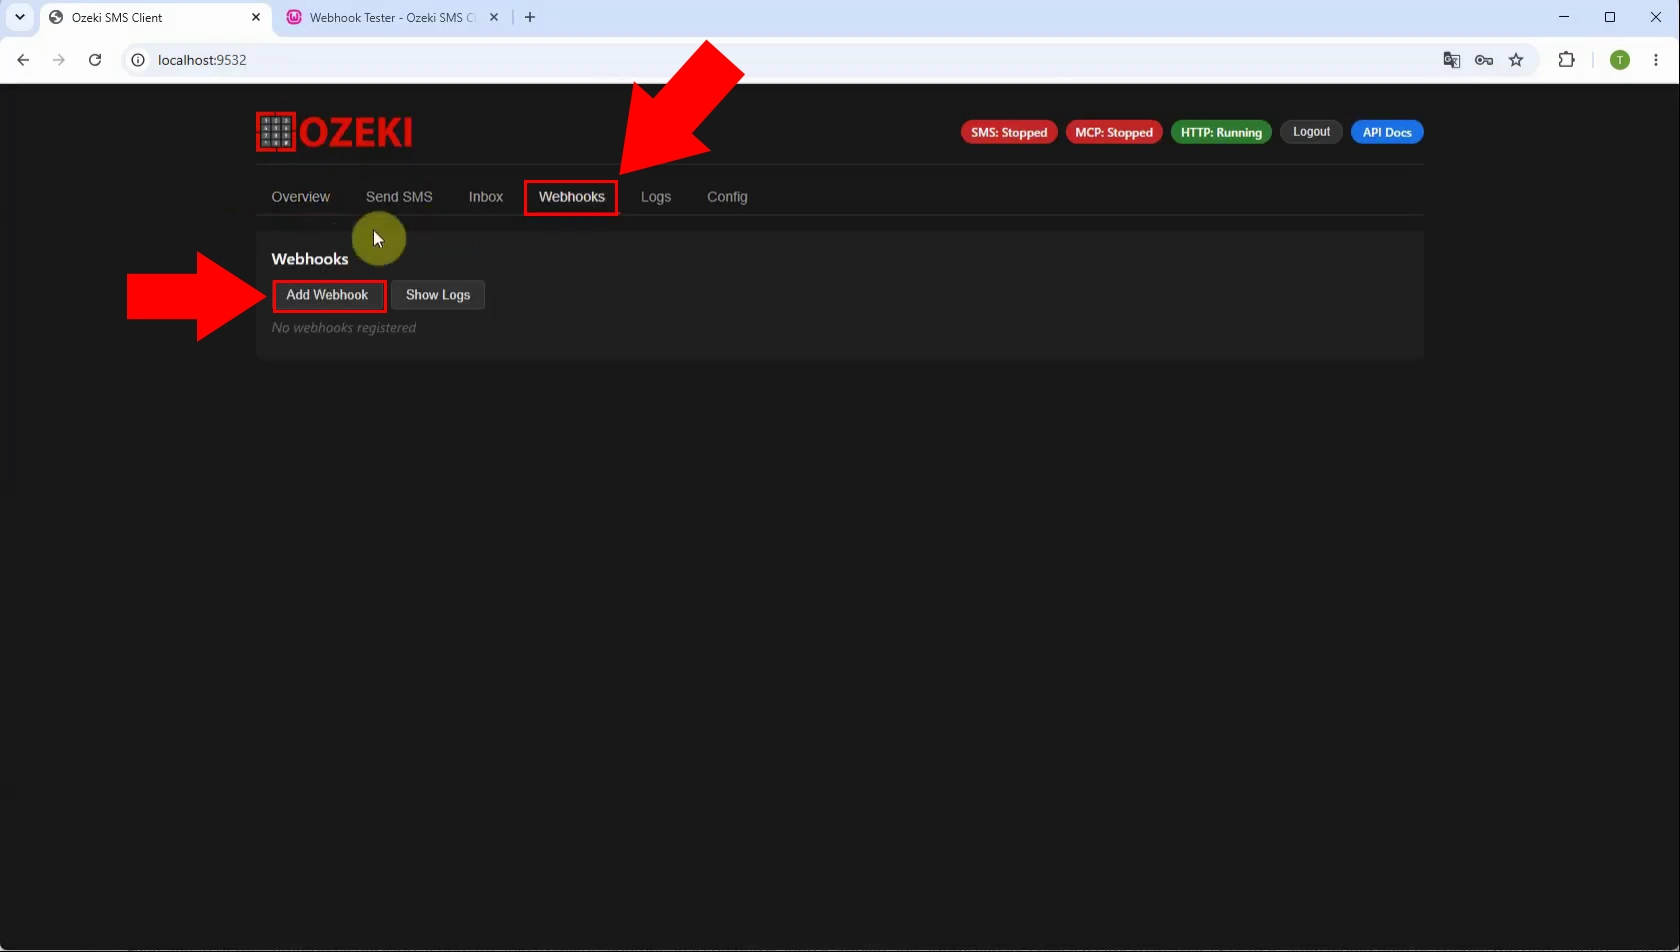
On the Webhooks page, choose the option to create a new webhook subscription. This opens a configuration form where you can define where incoming SMS events should be delivered. Provide a descriptive name so the webhook can be identified later.
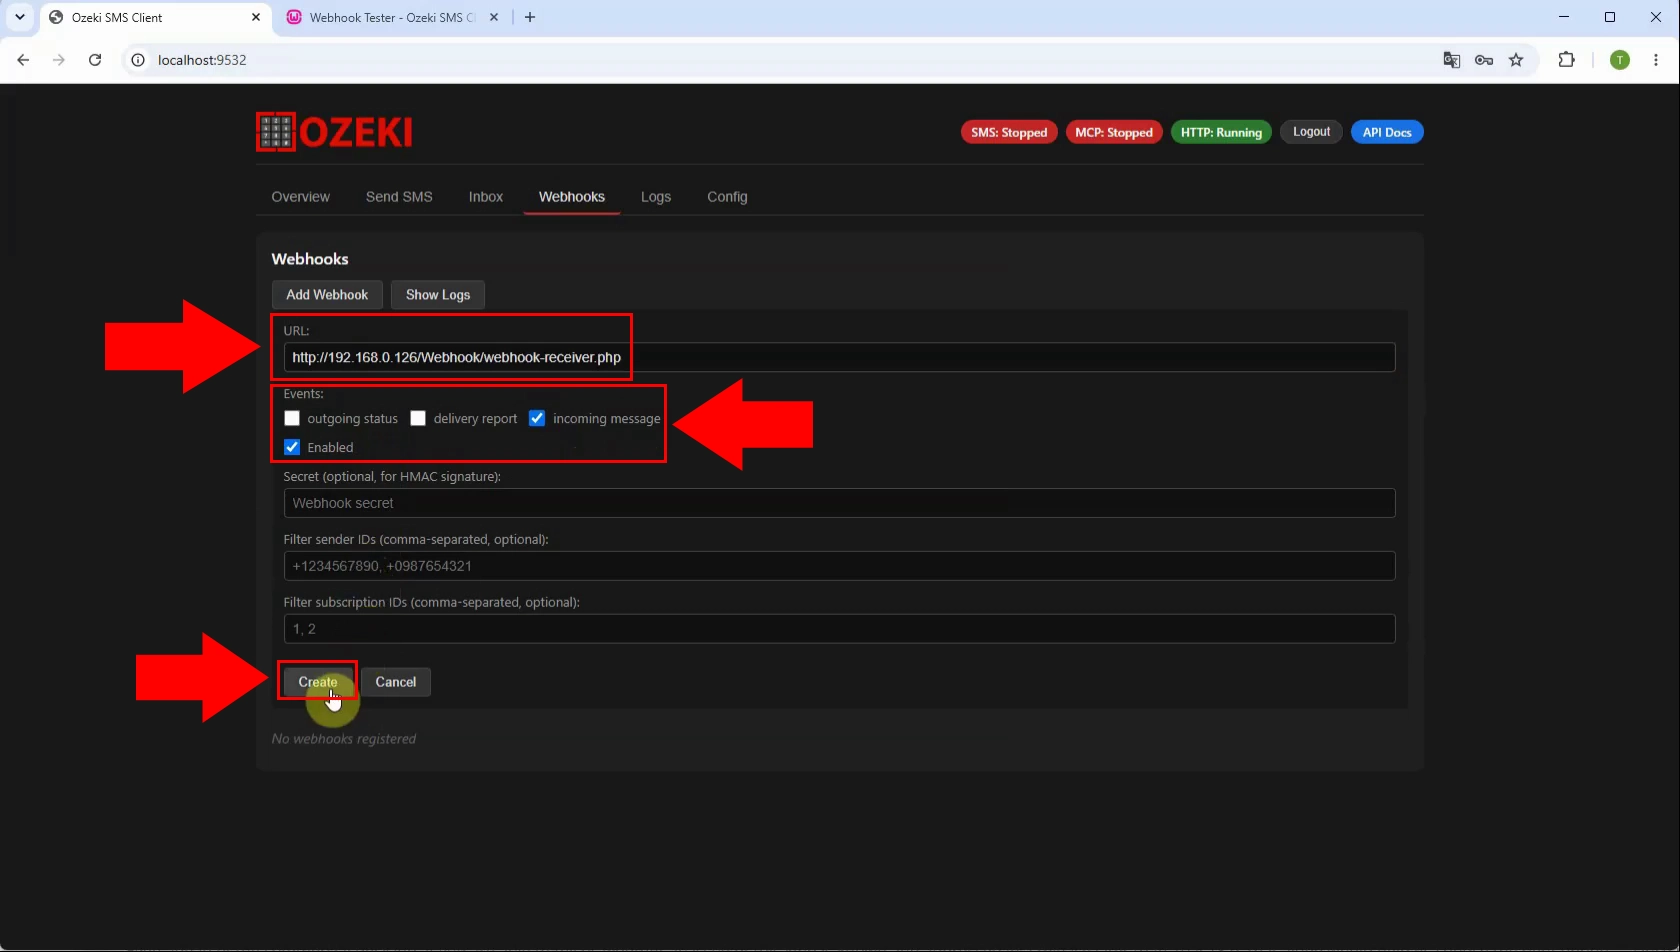
Enter the Webhook tester URL as the target endpoint for incoming message notifications. Select the incoming-SMS event and configure authentication details if your endpoint requires them. Save the configuration to activate delivery of received SMS messages.
The newly created webhook appears in the Webhooks list with its configured target URL and status. Verify that the webhook is enabled before testing the SMS delivery process. The Ozeki SMS Client will now use this subscription when a new message arrives.
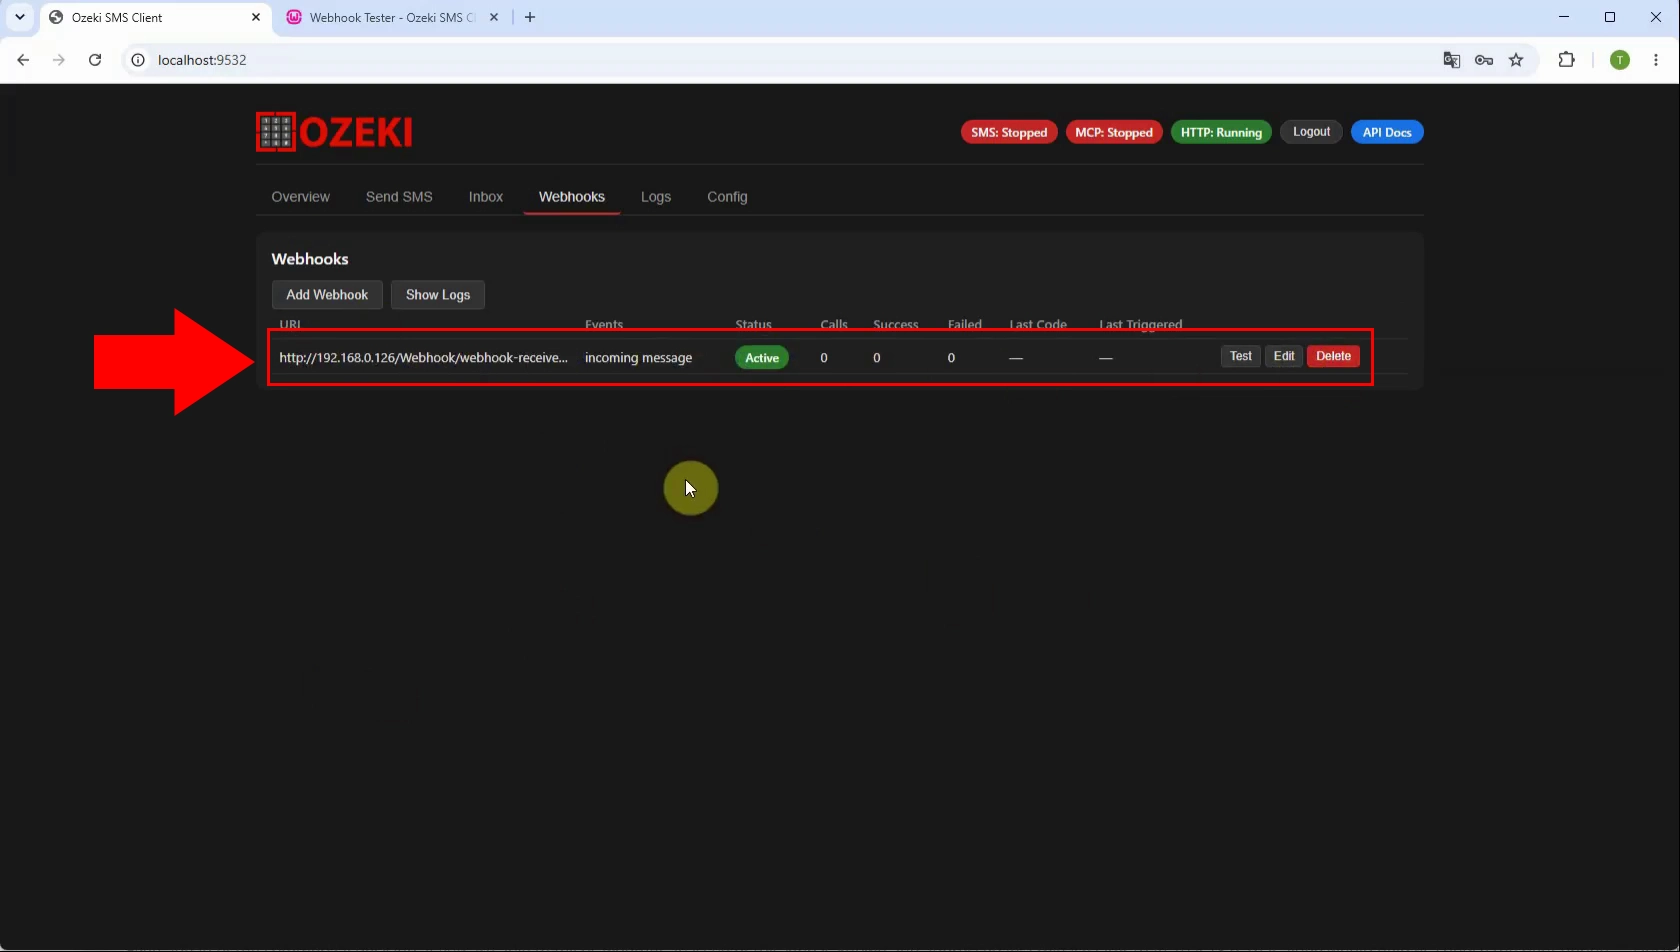
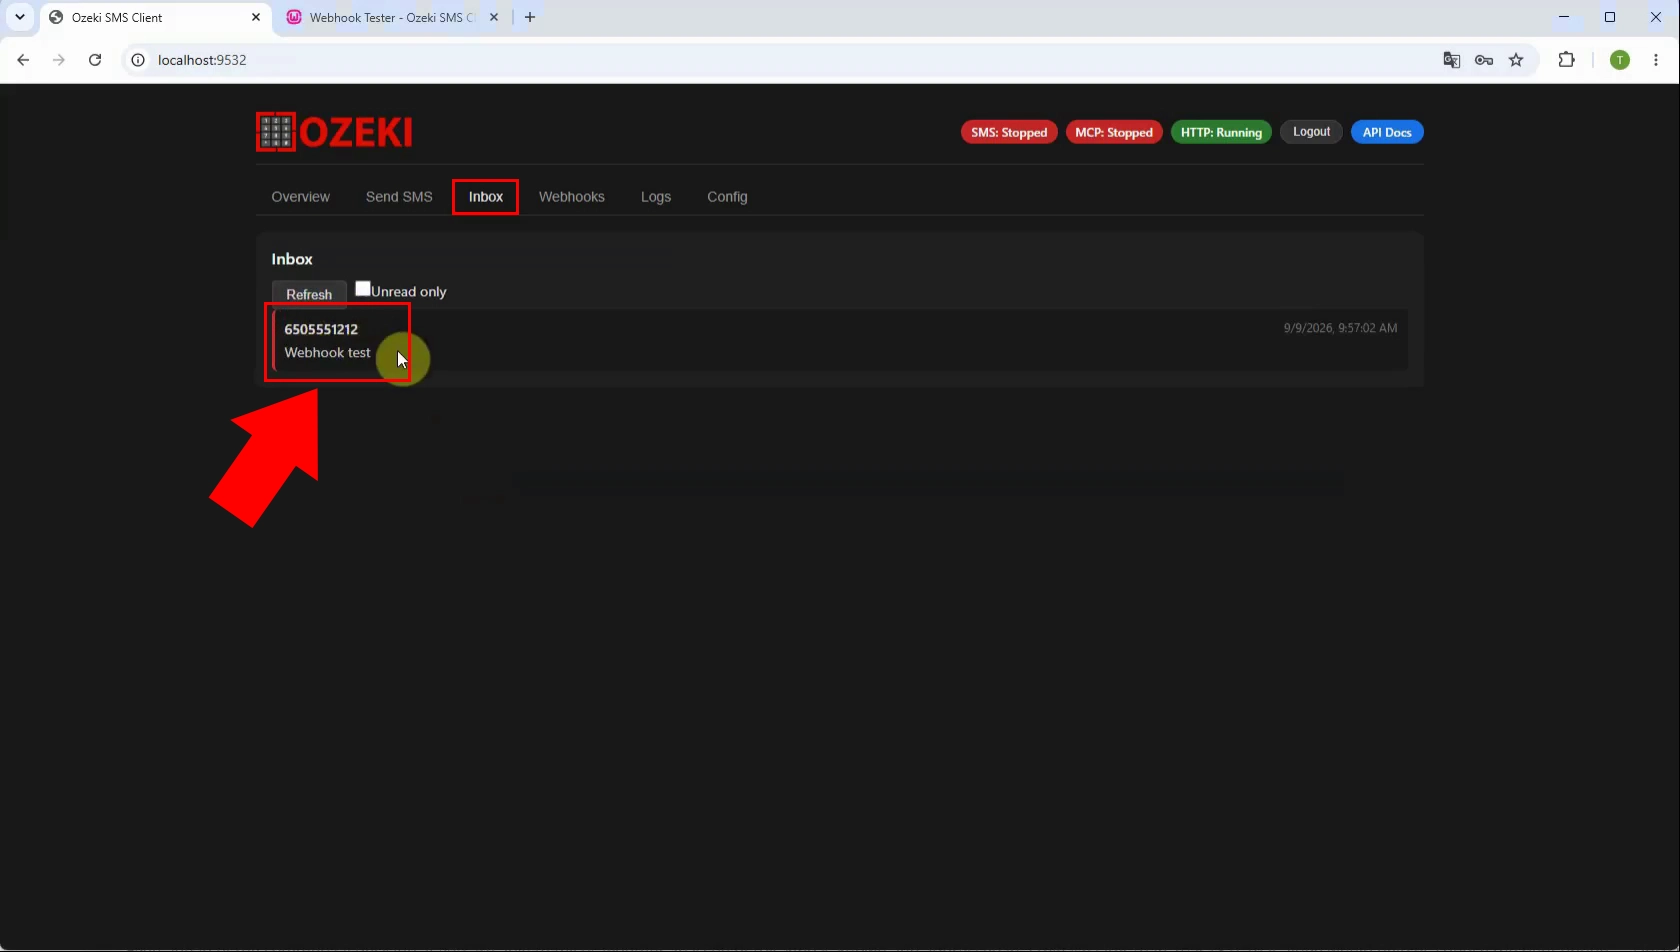
Send an SMS to the SIM card installed in the Android phone running Ozeki SMS Client. The application receives the message and generates an incoming SMS event. That event triggers the configured webhook notification.
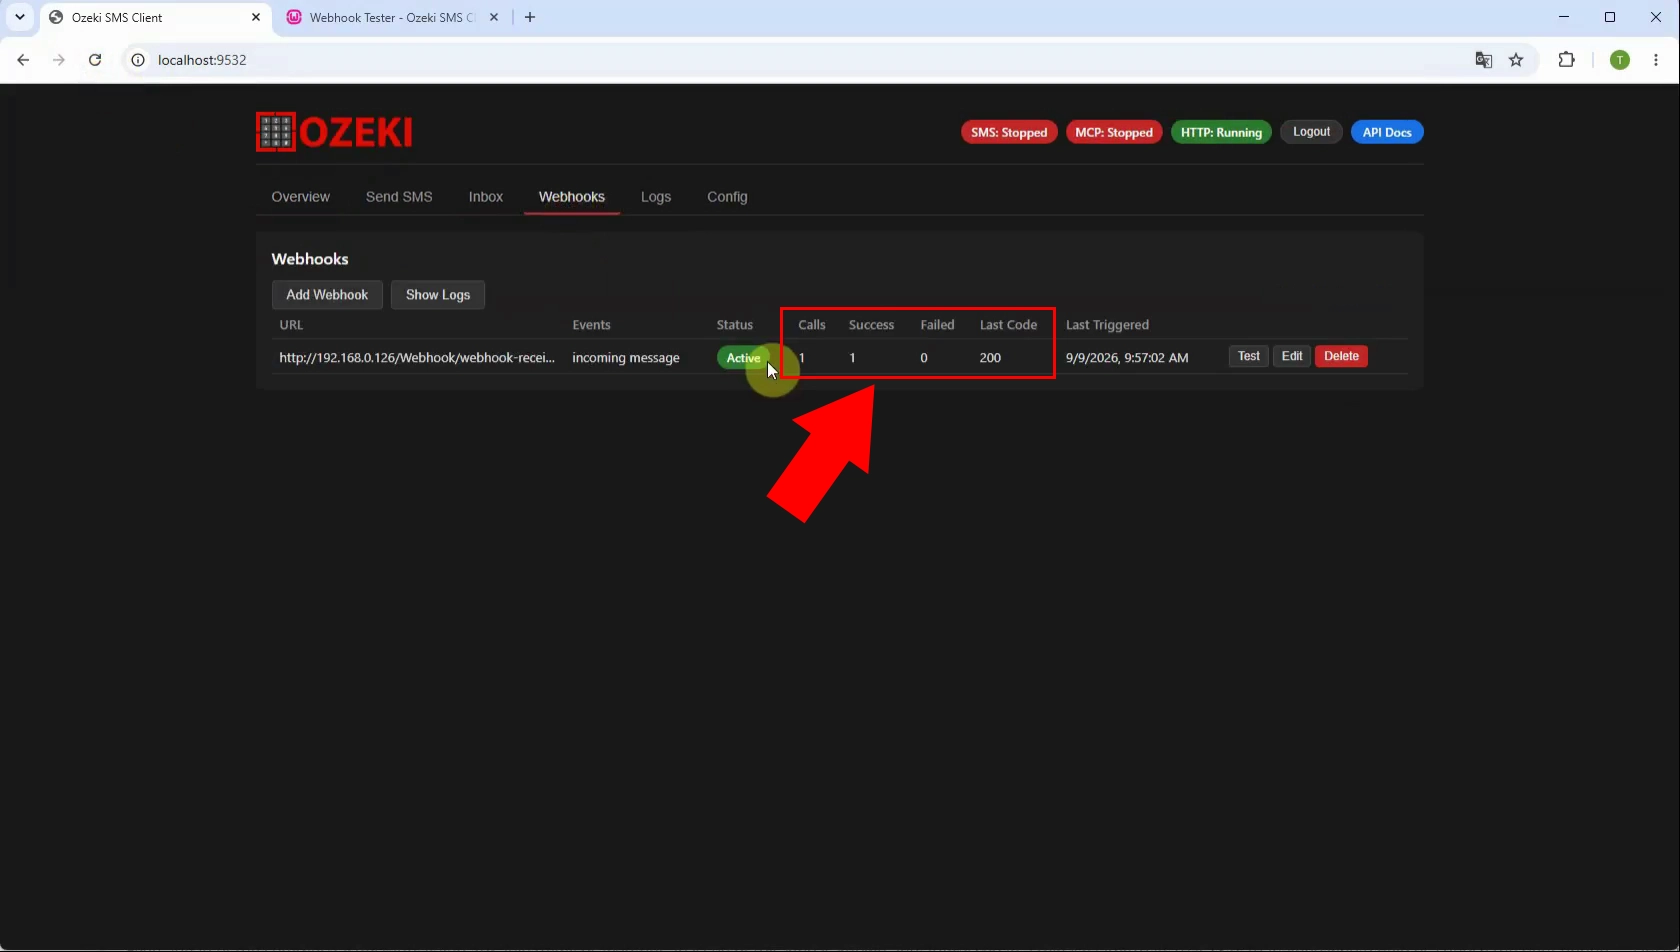
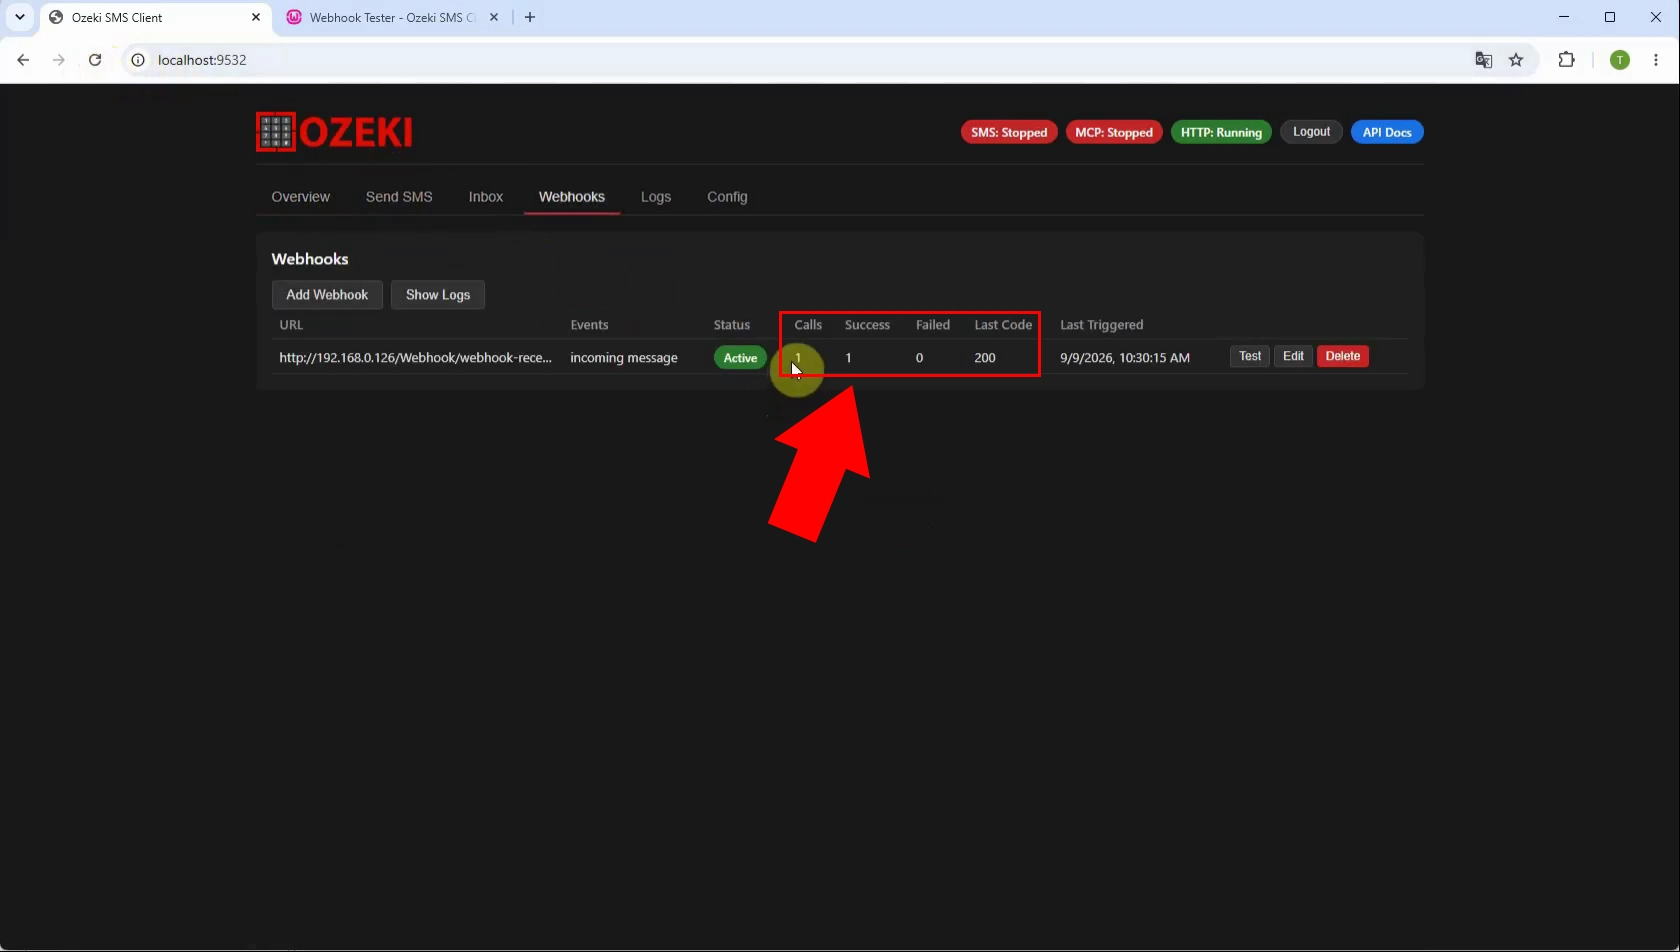
Open the webhook details or list view to inspect the call counter. The counter increases when Ozeki SMS Client successfully attempts a webhook request. Use it to confirm that incoming SMS events are being forwarded to the configured endpoint.
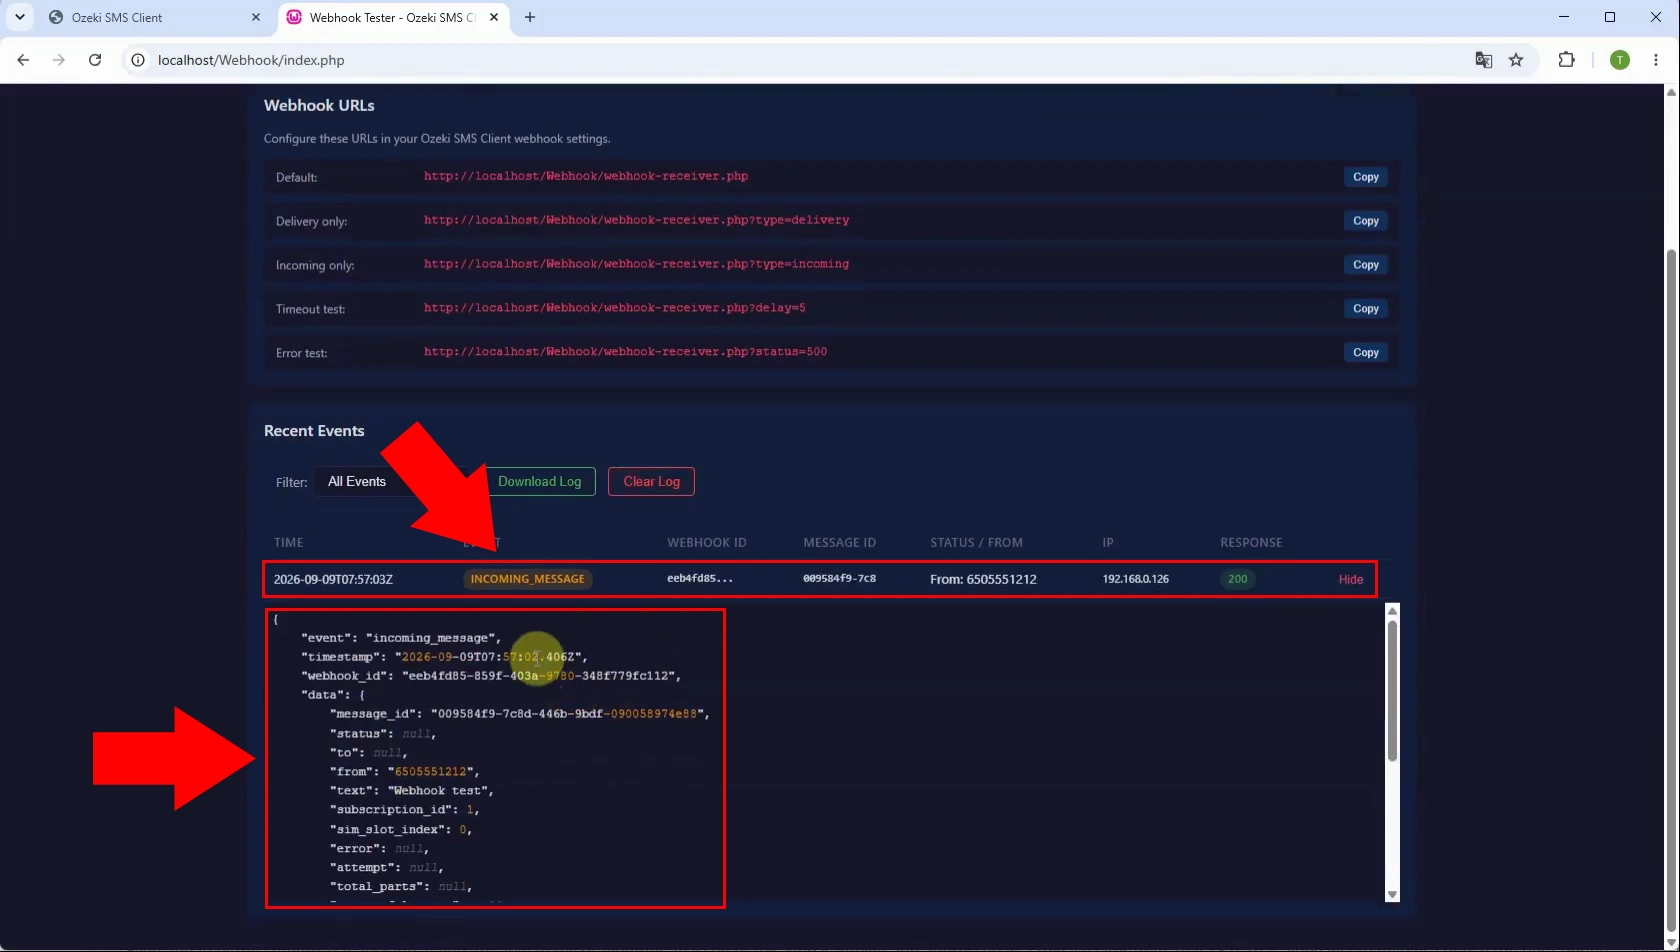
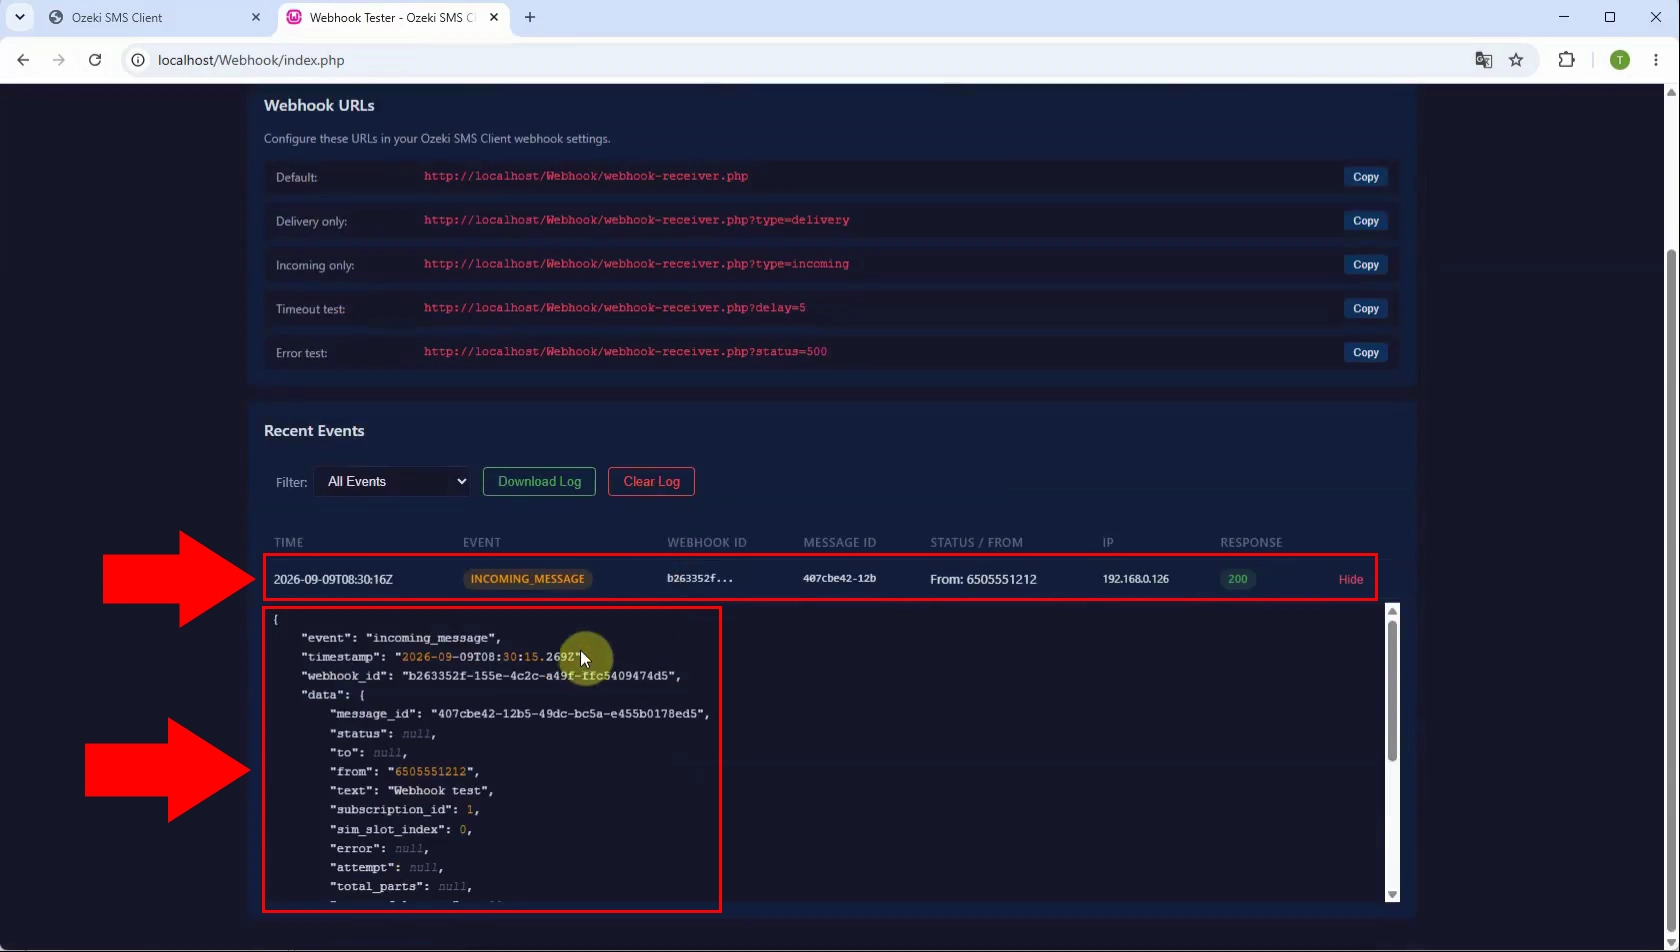
Switch to the Webhook tester after sending the test SMS message. It displays the HTTP request sent by Ozeki SMS Client, including the received message data. Confirm the sender, recipient, message text, and timestamp to validate the integration.
How to register webhook with Curl
Open the Ozeki SMS Client Web GUI and navigate to the Webhooks tab. This page lists existing webhook subscriptions and provides access to webhook management functions. Keep this page open while preparing the cURL request.
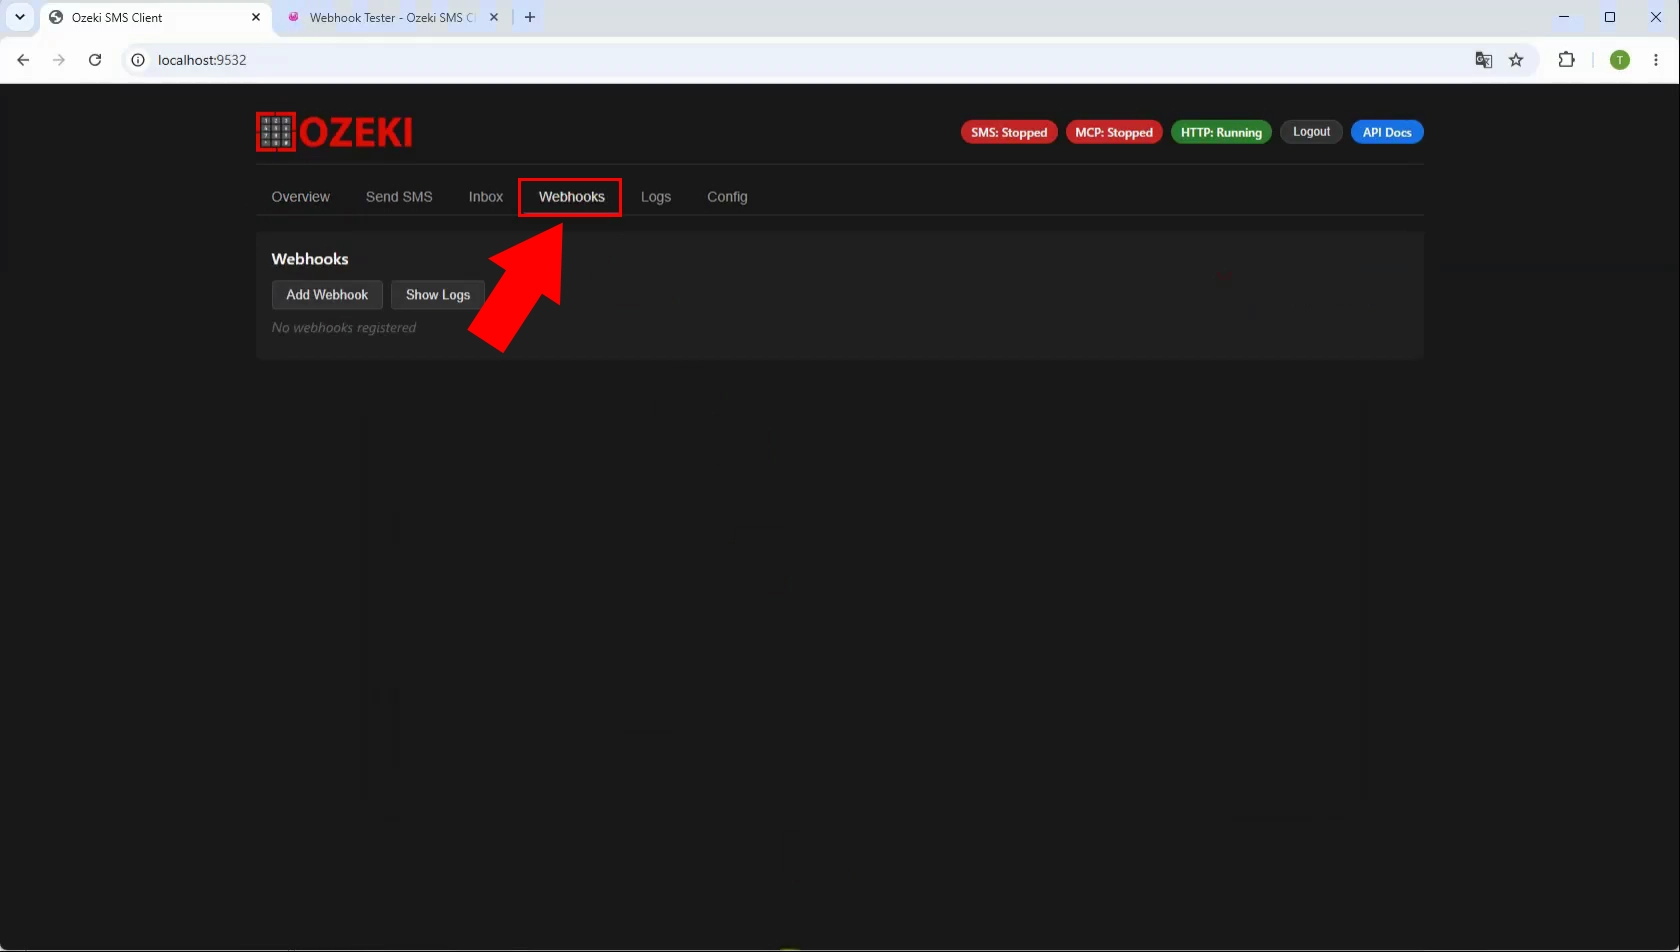
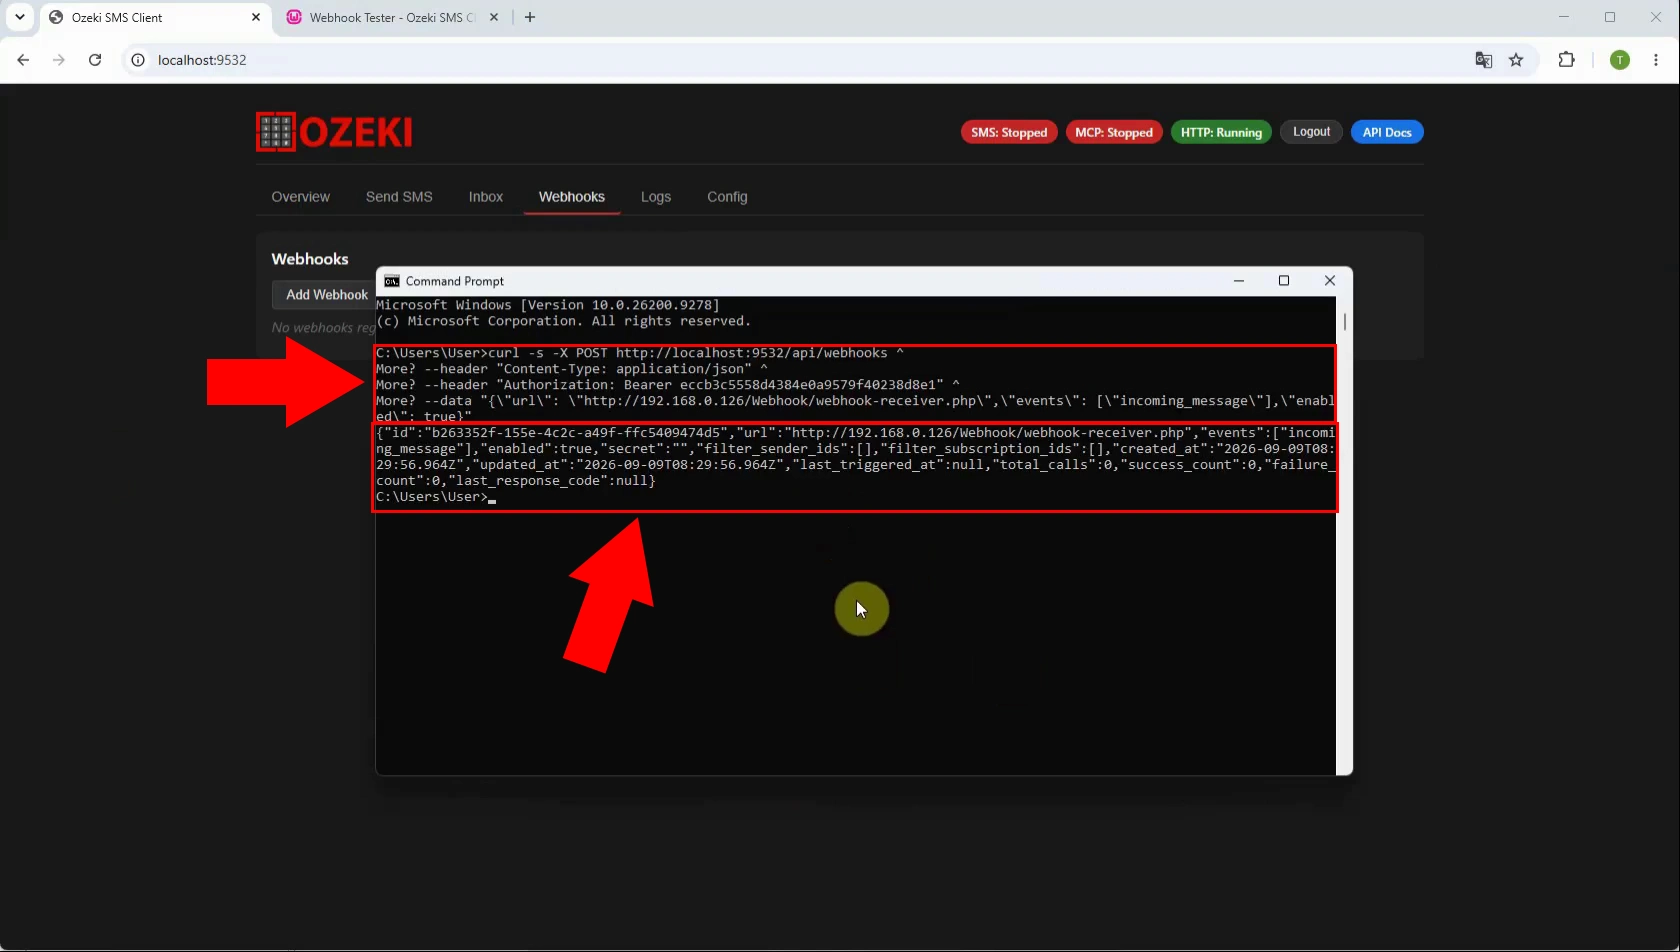
Use cURL to send an authenticated request to the HTTP API that creates a webhook subscription. Include the Webhook tester URL and select the incoming-SMS event in the request body. A successful API response confirms that the new webhook configuration was accepted.
curl -s -X POST http://localhost:9532/api/webhooks ^
--header "Content-Type: application/json" ^
--header "Authorization: Bearer eccb3c5558d4384e0a9579f40238d8e1" ^
--data "{\"url\": \"http://192.168.0.126/Webhook/webhook-receiver.php\",\"events\": [\"incoming_message\"],\"enabled\": true}"
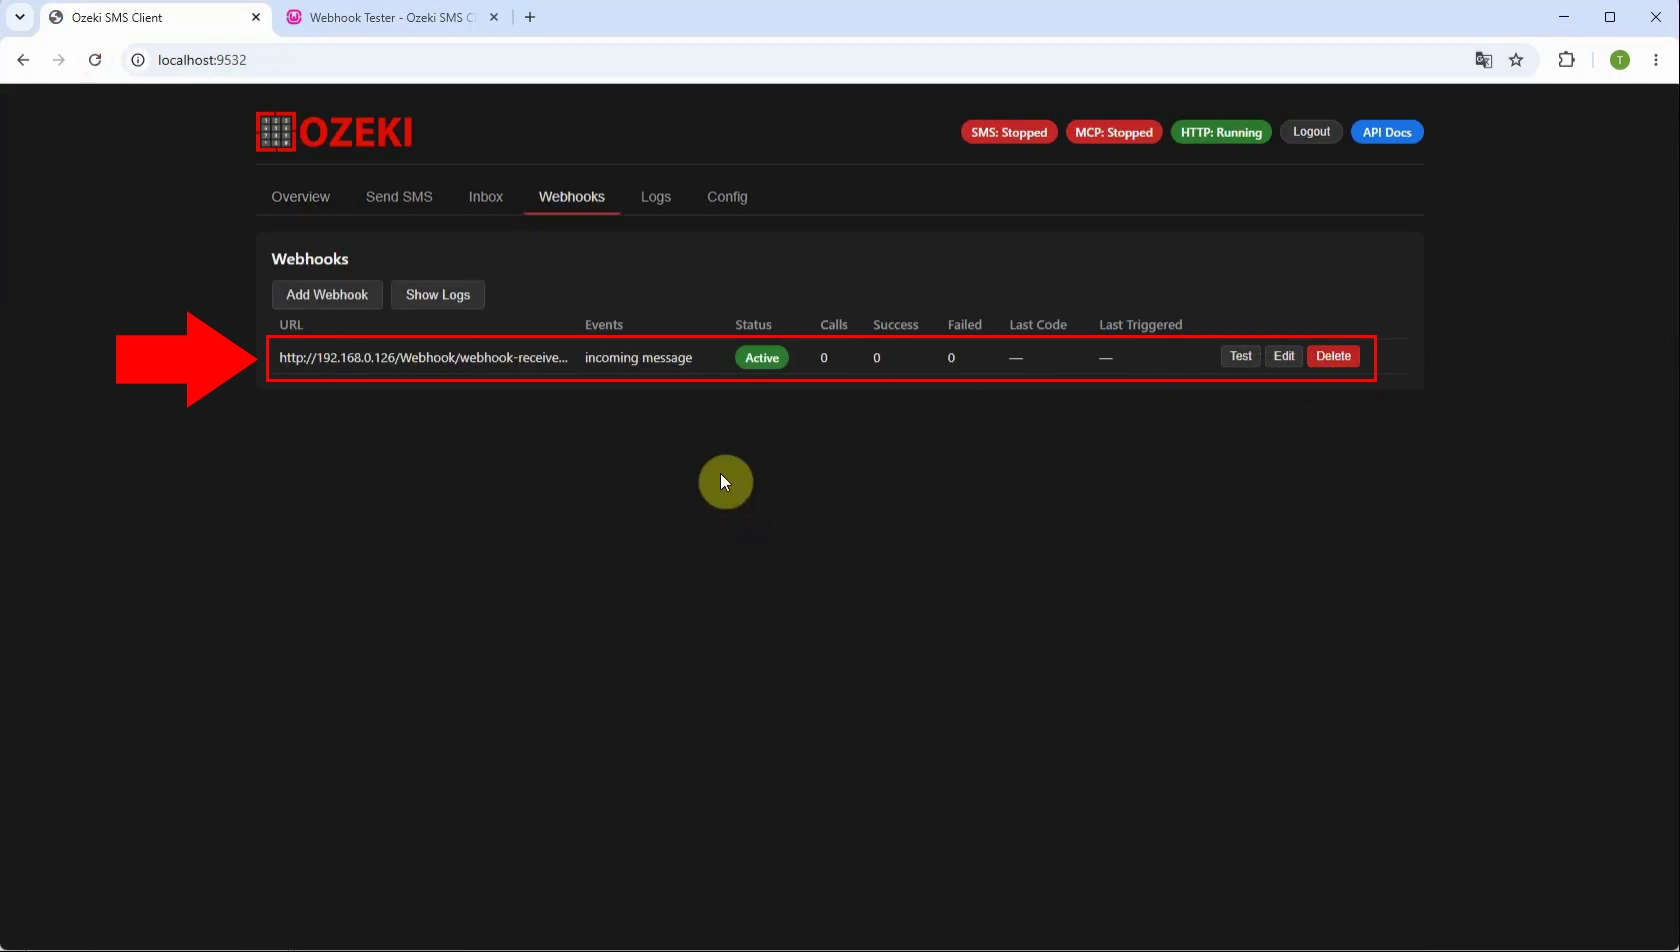
Return to the Webhooks tab after submitting the cURL request. The API-created webhook should appear in the list with its target URL and enabled status. This confirms that the subscription is ready to receive incoming SMS events.
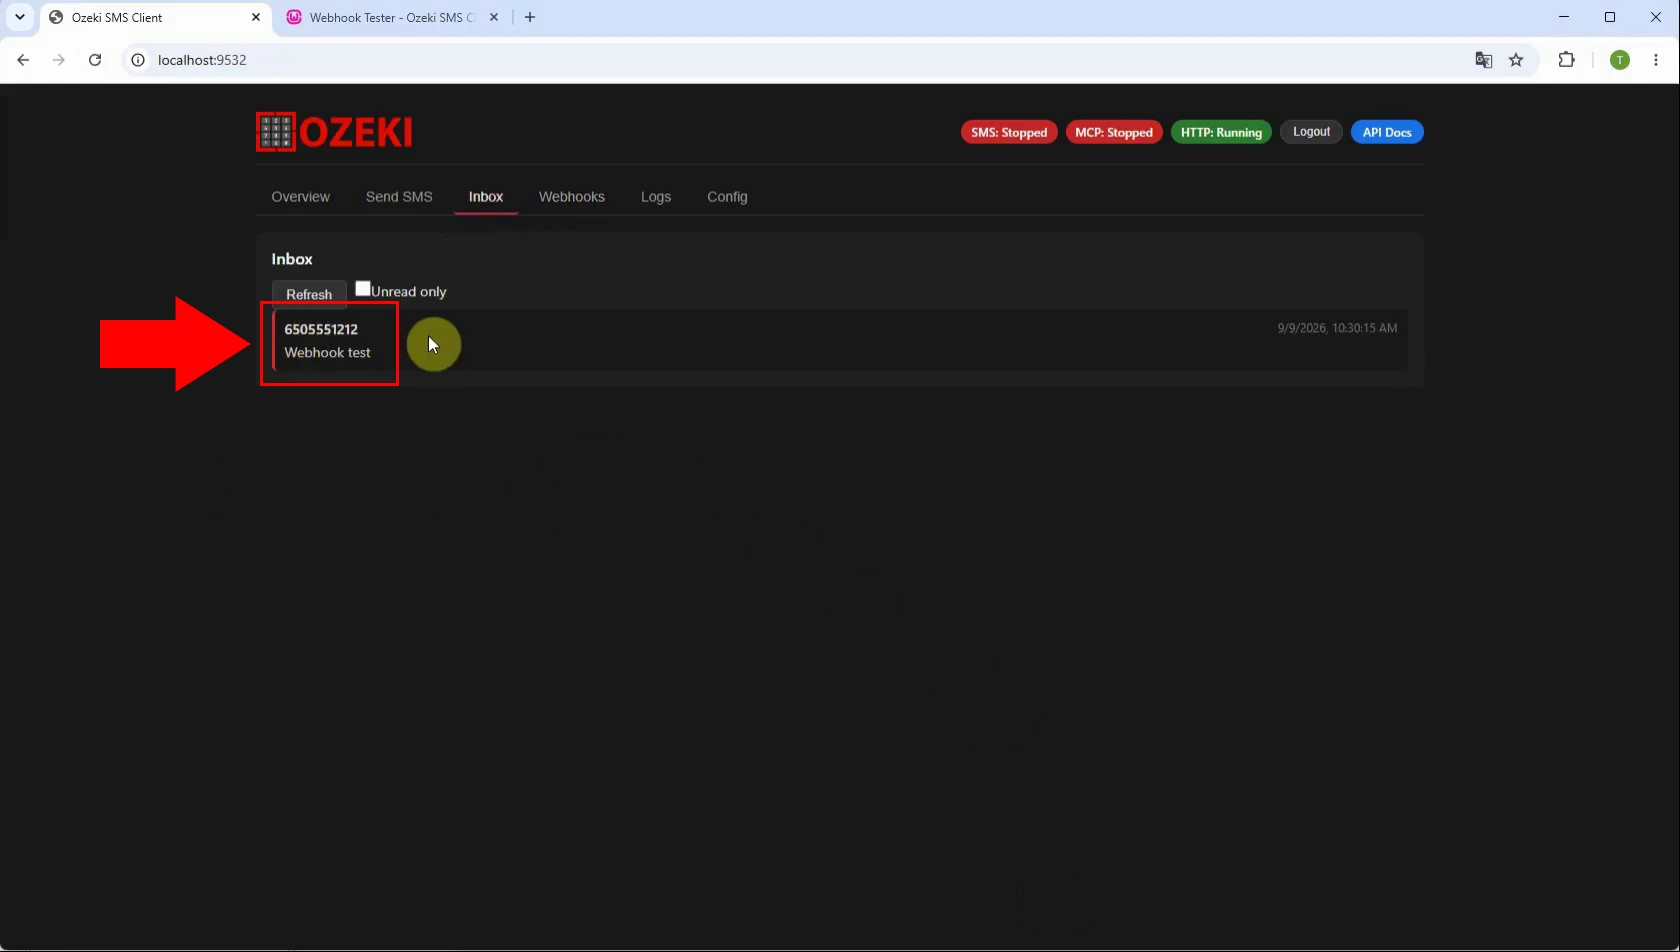
Send an SMS to the Android phone that runs Ozeki SMS Client. The gateway processes the incoming message and matches it with the registered webhook. It then sends the message data to the configured Webhook tester endpoint.
Review the webhook entry in the Webhooks tab after sending the test message. Its call count should increase, indicating that the HTTP API initiated a request to the endpoint. This provides a quick confirmation that webhook delivery was attempted.
Open the Webhook tester window after the test message has been delivered. The application records the incoming HTTP request and shows the SMS event payload. Check the request contents to ensure the webhook receives the expected message details.
How to check webhook logs
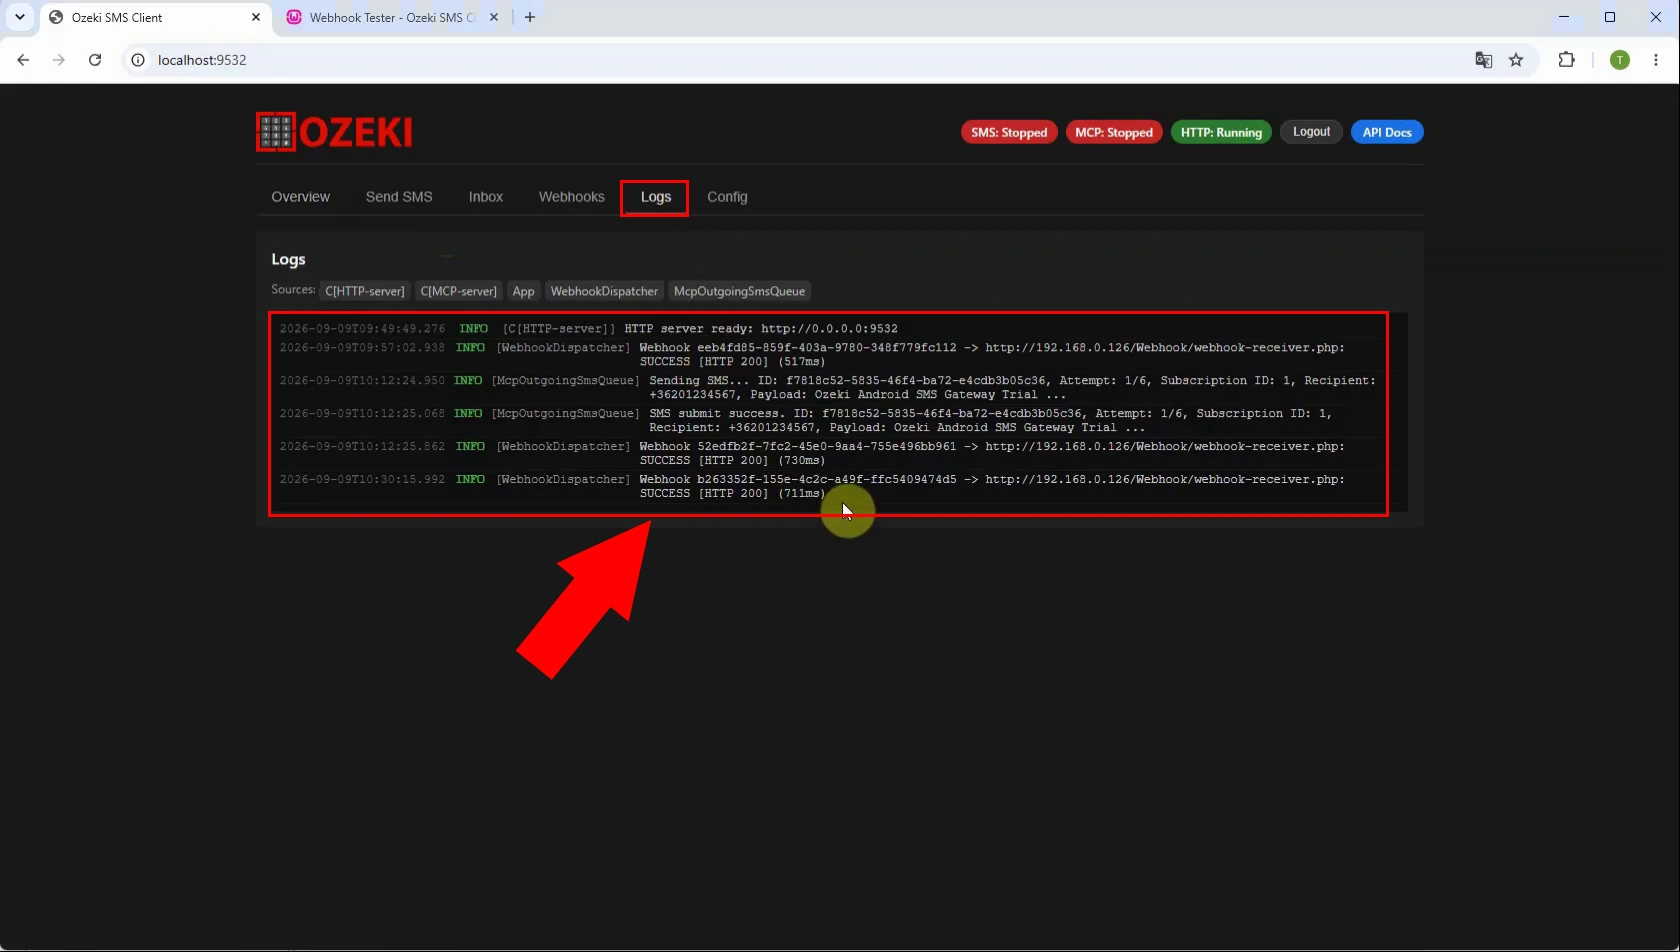
Open the webhook logs to review delivery attempts made by Ozeki SMS Client. Each log entry helps identify the target URL, response status, and possible delivery errors. Use these records to troubleshoot unavailable endpoints, authentication failures, or invalid responses.